E-Bike Kits: The 2026 DIY Guide to Electric Conversion
KE
KirbEbike Editorial
Reviewed by the KirbEbike conversion-support team
Share
Unlock £10 off today
On this page
An e-bike conversion kit adds a motor, battery and controls to a bike you already own — often for less than a complete e-bike, on a frame you already trust. The secret to a good build is not the wheel diameter: it is matching the donor bike and kit as one system, and confirming fit before you order. This beginner’s guide walks the whole decision — will a kit fit your bike, front hub vs rear hub vs mid-drive, how much power you actually need, how to choose the battery, installing safely, and UK law in 2026 — in plain English.
The short answer
A conversion kit combines a motor, battery and controls with a bicycle you already own. It can cost less than replacing the whole bike and lets you choose the motor position, power and battery capacity. Success depends on the donor bike as a complete system: confirm the frame and fork condition, axle or bottom-bracket standard, brakes, drivetrain, battery space, electrical match and intended legal use before ordering. The rule that matters most: choose the donor bike and kit as one matched system — and never modify a damaged or incompatible bicycle just to make a motor fit.
📚
In this series: Choosing a conversion kit
Start with this guide, then go deeper on the part that applies to your bike.
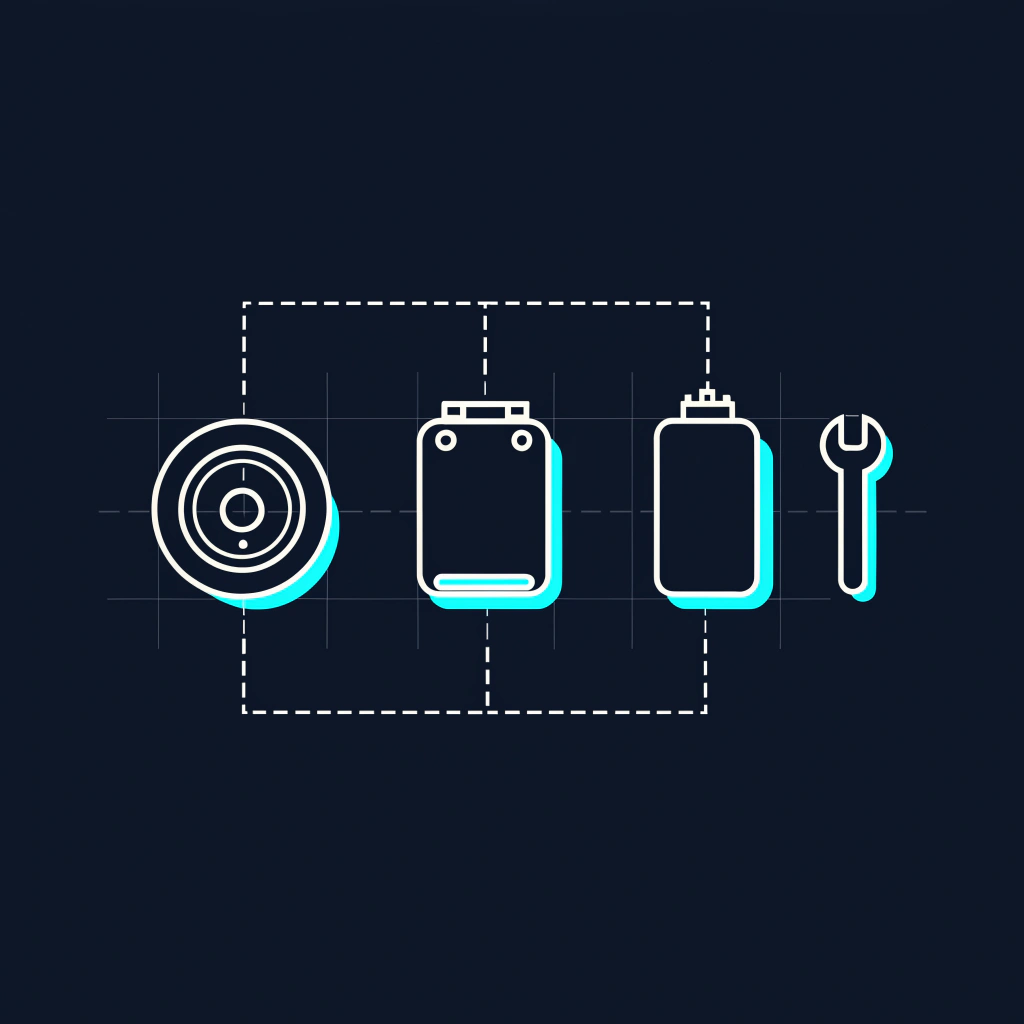
Same bike, new legs. A conversion keeps the frame you trust and adds the motor, battery and controls — when the fit is confirmed first.
📏
First: will a kit fit your bike? Before wattage, brand or price, confirm the kit matches your bike. The numbers, not the frame’s label, decide compatibility:
Axle & dropout — open dropout vs thru-axle, plus dropout width and material
Wheel size — by ETRTO bead-seat diameter on the tyre sidewall, not just the inch label
Brake interface — rim vs disc, rotor standard and diameter, caliper clearance, brake cut-off option
Drivetrain — freewheel vs cassette body, and sprocket count
Battery & clearance — case size, removal path, clearance from cables, suspension and pedalling
Electrical — controller mounting space; matching voltage and BMS current across battery, controller and motor
If any of these can’t be confirmed, resolve it before ordering — the full method is in the fit-check section below.
What Is an E-Bike Conversion Kit?
A conversion kit is the set of mechanical and electrical parts that turn an ordinary bicycle into a pedal-assisted one. You don’t buy a new machine — you attach a motor, a battery and the electronics that connect them, and the bike helps you pedal.
What normally comes in a kit?
Typically: a front, rear or mid-drive motor, battery, battery mounting plate, motor controller, pedal-assist sensor, display or control pad, main wiring harness, brake cut-off levers or sensors, axle washers and fasteners, a throttle where included, charger and instructions. One important distinction: a “motor-only kit” and a “complete kit with battery” are not equivalent offers — the price gap between them is usually the battery, the most expensive single component.
How the parts work together
The power path is simple: the battery holds the energy, the controller manages the current, the pedal sensor or throttle tells the controller what you want, the controller drives the motor — and the brake sensors cut assistance the moment you brake.
Kit or Complete E-Bike: Which Route Makes Sense?
Neither route is automatically better — it depends on the bike you already have and how much you want to do yourself.
A kit makes sense when the donor bike already fits you well, the frame and brakes are in good condition, you want to choose the battery and power level yourself, you’re comfortable with installation (or have a mechanic), and the conversion still saves money after tools and any replacement parts.
A complete e-bike makes sense when your bicycle needs major repairs, the frame is incompatible, you want one integrated warranty, battery mounting would be difficult, you’d rather avoid DIY maintenance — or the combined cost of kit, tools, upgrades and labour approaches the price of a suitable complete bike.
Decision factor
Conversion kit
Complete e-bike
Starting bike required
Yes
No
Customisation
High
Usually lower
Installation work
Required
Minimal
System integration
Depends on installer
Factory designed
Initial cost
Can be lower
Often higher
Warranty structure
Separate bike and kit
Usually one vehicle
Component replacement
Often modular
May be proprietary
Best for
A bike you already like
A ready-to-use system
Is It Cheaper to Build Your Own E-Bike?
If you already own a suitable bike and basic tools, usually yes. It stops being cheaper when the donor bike needs new brakes, tyres, drivetrain parts or wheels, or when a specialist does the installation. Budget the whole build, not just the kit price:
Cost category
What to include
Conversion kit
Motor, controller, sensors and display
Battery
Capacity, cells, BMS and charger
Donor-bike repairs
Chain, cassette, tyres, bearings and cables
Safety upgrades
Brake pads, rotors, torque arms and tyres
Tools
Pullers, spanners, torque wrench and stand
Professional work
Wheel building, electrical checks or fitting
Future maintenance
Brake, tyre and drivetrain wear
The cheapest kit is not always the lowest-cost build: an incomplete kit can mean paying separately for a battery, connectors, brake controls, a freewheel or cassette, torque arms, or special tools. Treat the headline price as a starting figure.
Front Hub vs Rear Hub vs Mid-Drive
This is the decision that shapes the whole build — each motor position suits a different rider.
Front-wheel hub kit
Best for: beginners, moderate-power commuting, bikes with a suitable front fork, and keeping the rear drivetrain untouched — a bundled front-wheel system like the EZ Rider Kit is the typical shape of this route.
Pros
No gears to work around
Typically the easiest install
Motor wheel is easily removed
A natural fit for legal commuter builds
Trade-offs
Extra weight in the steering
Reduced traction on steep or loose surfaces
Fork material and dropout condition need careful checks
Unsuitable for many carbon, suspension or thru-axle forks
Still needs a proper torque arm
Rear-wheel hub kit
Best for: riders who want rear-wheel traction, moderate-to-high-power builds, and commuting, cargo or private-land projects — from a 48V 1000W rear hub upwards, this is the layout that carries the power.
Pros
Familiar rear-drive handling
Better traction under acceleration
No effect on steering
The widest power range of any layout
Trade-offs
Freewheel vs cassette compatibility matters
Dropout width and axle fit must be measured
Rear-wheel removal is more involved
Motor-cable and derailleur clearance need checking
High-torque motors demand secure axle restraint
Mid-drive kit
Best for: steep hills, technical off-road riding, central weight, and bikes with compatible bottom brackets — the torque-sensing Z16 mid motor is KirbEbike’s entry in this class.
Pros
Uses the bike’s own gears
Superb low-speed climbing
Keeps the original wheels
Concentrates weight centrally
Trade-offs
The most complex install of the three
A perfect bottom-bracket fit is required
Faster chain, chainring and cassette wear
Shifting technique matters
Friction-drive kit
Best for: minimal or temporary setups that move between bikes.
Pros
A roller pressed against the tyre — nothing else changes
Quick to fit and remove
The lightest-commitment way to try assist
Trade-offs
Less effective in the wet
Less efficient over distance
A specialist option, not a like-for-like hub or mid-drive alternative
Which Bike Is Best to Convert?
Condition beats category. A sound frame, common standards, good brakes and battery space matter more than what kind of bike the label says it is.
A good donor bike — whatever the category — has a sound frame with no cracks or serious corrosion, the correct frame size, predictable steering, strong wheels, serviceable bearings, brakes suited to the intended speed and weight, common wheel and axle standards, space for a battery, and no existing drivetrain problems.
Hybrid and commuter bikes — the easiest candidates: upright position, standard wheel sizes, frame-triangle battery space, practical tyre clearance, rack and mudguard mounts
Hardtail mountain bikes — good for rougher roads and private-land builds: wider tyres, stronger frames and wheels, larger rotors. Check the suspension fork before choosing a front motor
Road and gravel bikes — check 700C rim dimensions, tyre clearance, drop-bar control compatibility, brake type, narrow rear spacing on older frames, thru-axles on newer ones, and battery clearance
Folding bikes — may need narrow hubs, special wheel sizes, flexible routing and compact batteries; a folder-specific kit is usually the safer route
🚫
Bikes that should not be converted. Avoid conversion — or get a professional assessment first — when the bike has cracked or badly corroded frame sections, damaged dropouts, unsupported carbon motor-mounting points, poor brakes, worn steering components, proprietary axle systems with no compatible kit, no secure battery location, or suspension movement that can pinch cables or hit the motor.
How to Check Whether a Kit Will Fit
Run this pre-purchase sequence before ordering anything — the measurements decide compatibility.
Check the wheel size. Record both the common label (26″, 27.5″, 29″ or 700C) and the ETRTO bead-seat diameter printed on the tyre sidewall. Never identify wheel size by eye.
Measure the dropout and axle. Front or rear spacing, open dropout vs thru-axle, slot width, axle diameter, over-locknut dimension and frame material — the wheel and dropout size guide walks this step through.
Identify freewheel or cassette. Check the physical mounting interface, not just the number of rear gears.
Check the brakes. Rim or disc, six-bolt or Center Lock rotor, rotor diameter, caliper clearance, lever compatibility and whether a motor-cutoff sensor is available.
Check battery space. Use a cardboard template or the published dimensions: it must fit the frame, slide on and off its rail, sit on strong bosses, clear cables, suspension and pedalling.
Check the electrical match. Battery nominal voltage, controller voltage, motor voltage range, BMS continuous current, controller current limit, connector types, charger voltage, and display and sensor protocol.
How Much Motor Power Do You Need?
Choose the lowest power that safely meets your terrain, load and legal use — not the largest motor available.
250W — UK-compliant assistance. Public-road commuting, cycle routes, leisure riding and moderate hills. In Great Britain an EAPC motor must be rated no more than 250W continuous with assistance stopping at 15.5 mph (GOV.UK); a non-compliant conversion is treated as a motor vehicle. Shop these in the Road Legal Kits collection.
500W–750W — stronger private-land assistance. Kits like the 500W/750W MTX give better acceleration for heavier riders, loads and moderate off-road routes, at the cost of higher battery draw and more demand on brakes and frame. Above 250W is not an EAPC — on public roads it falls under motor-vehicle requirements, and private-land riding needs the landowner’s permission.
1000W–2000W — performance builds. Strong acceleration and sustained private-land riding — with larger batteries, torque arms, brake upgrades and a frame inspection as requirements.
3000W and above — specialist builds. A vehicle-level approach: reinforced axle restraint, a suitable frame, strong wheels, a high-current battery, correct wiring, hydraulic brakes and incremental testing.
High power is its own category. A 3000W label doesn’t set one top speed — voltage, winding, controller current, wheel size and load all decide it, and these builds live outside EAPC limits.
One caution on speed claims: a 3000W label does not determine an exact top speed. Speed also depends on battery voltage, motor winding, controller current, wheel diameter, loaded voltage, rider weight, aerodynamics, gradient, tyres and software. Read any manufacturer figure as an estimate under stated test conditions — and remember a build at this level needs substantially more braking, tyre, wheel and frame capacity than a commuter conversion. The Off-Road Kits collection lists the high-power range.
How to Choose the Battery
Voltage must match the system. A 36V, 48V, 52V, 60V or 72V battery may only be used with components rated for it — the controller, motor, display and charger all have to agree. Don’t pick a voltage purely for desired speed.
Watt-hours determine stored energy. Compare energy in watt-hours (nominal voltage × amp-hours) — far more useful for range than amp-hours alone:
Battery
Nominal energy
36V 15Ah
540Wh
48V 15Ah
720Wh
48V 20Ah
960Wh
52V 20Ah
1,040Wh
72V 20Ah
1,440Wh
BMS current must support the controller. Confirm the continuous BMS current, the peak rating, the controller’s battery-current limit, cell capability, connector rating and wire gauge. A pack that can’t deliver the controller’s current will sag or cut out under load.
🔍
Verify the battery like a buyer, not a shopper. Before ordering, confirm and keep on file: the exact cell model and brand (for example LG or Samsung 21700) and who assembled the pack; BMS continuous and peak ratings against the controller’s draw; the charger’s model and charge-current limit; the protections present (over-charge, over-discharge, over-current, short-circuit, thermal); conformity documentation per the UK OPSS guidance (UN 38.3 covers transport only); a serial number; and a local warranty route so a fault doesn’t mean shipping a battery abroad. GOV.UK treats component incompatibility and missing protections as safety risks, and the London Fire Brigade advises reputable sellers, the correct charger, and never using modified or incompatible batteries.
Position affects handling. Where practical, mount the battery low and central in the frame triangle. Rack and compact frame mounts can work — balance and cable routing decide. KirbEbike’s Taishan and HS-II triangle packs pair a 60A continuous BMS with matched 5A chargers across 48V–72V.
Tools You’ll Need
Basic bicycle tools: Allen keys, spanners, screwdrivers, tyre levers, a pump, cable cutters, a torque wrench, a bike stand, degreaser and grease. Hub-motor tools: potentially a cassette lockring tool, chain whip, freewheel remover, rotor tools, an axle-nut socket and a spoke key. Mid-drive tools: potentially a crank puller, bottom-bracket tool, motor lockring tool, pedal spanner and chain tool. Electrical tools only where the kit requires them: a multimeter, proper crimping tool, heat-shrink and insulated connectors — if you’re not trained to modify high-current battery wiring, choose a plug-and-play kit instead.
Installing Safely: the Hold Points
Installation differs materially between front hubs, rear hubs and mid-drives, so this is a safety-led overview, not a universal sequence — always follow the exact procedure and torque figures in your kit’s manual. Start on a fully serviced, undamaged bike, photograph the original washer order and cable routing first, and stop at each hold point until it’s confirmed.
📌
Hold points — do not skip any.
Torque-arm orientation: fitted the correct way round for your motor and dropout — a reversed arm can let the axle spin out
Axle-nut torque: tightened to the stated value with a torque wrench, never by feel
Cable strain relief: slack for steering and suspension, protected against abrasion, connectors pointed away from where water collects
Brake cut-off testing: sensors reliably cut motor power, tested with the driven wheel off the ground before any ride
First-ride re-torque: after a short low-speed test, re-check axle nuts, torque arms, motor bolts and spoke tension
Professional inspection: if frame condition, brake suitability or bottom-bracket fit is at all uncertain, have a mechanic check the build first
🚫
Installation mistakes that damage bikes.
Forcing the axle into the dropouts — it must seat fully and evenly; never file or bend to force a fit
Torque washers in the wrong order — can prevent seating, misalign the wheel or damage the motor cable
Skipping torque arms on powerful hub motors
Mounting the battery with cable ties alone — ties manage wiring, they don’t carry structural load
Cables that rub or stretch — check the head tube, pivots, hinges, cranks, axle, rotor and tyres
Ignoring brake performance on a heavier, faster bike
Connecting an incompatible battery — wrong voltage, polarity, connector or current can damage components or start a fire
UK Law for DIY Conversions in 2026
The details decide legality. Pedals, the motor’s continuous rating, the 15.5 mph cut-off and how assistance is delivered all matter — not one display setting.
To be an EAPC the bike must have pedals capable of propelling it, a motor rated at no more than 250W continuous, assistance that stops above 15.5 mph, a rider aged at least 14, and the required markings (GOV.UK). A compliant EAPC can generally be used wherever ordinary cycles are permitted.
Higher-power kits fall outside EAPC rules and are treated as mopeds or motorcycles — registration, tax, insurance, licensing, an approved helmet and vehicle approval may apply (Cycling UK). And a display limit is not enough: setting a high-power motor’s screen to 15.5 mph does not make it an EAPC — the continuous rating, the assistance behaviour, the markings and the complete vehicle all matter. Private land means land where you have the owner’s permission — it does not automatically include public trails, parks, bridleways or cycle routes.
Choosing a Kit: Position First, Then Fit
This beginner hub doesn’t rank brands — use the compact table to choose a motor position and fit path, then compare specific models in a dedicated comparison:
Provider
Motor position
Primary use
Main strength
Important fit check
KirbEbike
Front, rear and mid-drive
Commuting to private-land performance
Broad configuration range, bundled batteries
Exact product and frame fit
Swytch
Front hub
Lightweight commuting
Compact conversion
Fork and battery mounting
Cytronex
Front hub
Lightweight road and hybrid
Discreet engineered package
Fork, brake and wheel option
Boost
Rear hub
Lightweight rear-drive
Natural handling, UK support
Rear axle and cassette standard
⚠️
What to avoid when buying any kit.
Untraceable batteries — no clear seller, labels, correct charger, instructions, warranty or BMS information
Listings with no fit dimensions — a reputable page confirms wheel size, axle standard, dropout width, brake interface, drivetrain compatibility and battery dimensions
Speed claims without test conditions — voltage, wheel size, controller, rider weight, surface and legal use should all be stated
Mismatched components — never combine motor, battery and controller by connector appearance
No spare parts or support — check availability of displays, controllers, sensors, cables, chargers and torque arms
A high-power kit for an unprepared bicycle — bigger brakes, torque arms and stronger tyres are requirements, not extras
Maintenance and Lifespan
After the first rides: recheck motor axle nuts, torque-arm fasteners, the battery mount, wheel alignment, spoke tension, brake alignment and cable movement. Monthly: tyre wear and pressure, brake pads, connectors, cable abrasion, chain wear, battery mounting, loose spokes, and any water or corrosion. Battery care: use the supplied charger (matched 2A and 5A replacements are stocked for KirbEbike packs), charge in a clear dry area away from your exit route, never charge a damaged or swollen pack, let a hot battery cool first, and never open or rebuild a pack.
How long does a converted e-bike last? There’s no single figure — the frame, motor, controller, battery, brakes and drivetrain wear at different rates. A well-installed, well-maintained conversion stays useful for years; component quality, weather exposure, mileage, load, power level and battery treatment decide how many.
Final DIY Checklist
📋
Before you order.
Donor bike inspected: sound frame, fork, brakes, wheels and drivetrain
Wheel size confirmed by tyre sidewall (label + ETRTO)
Dropout type/width, axle standard and frame material recorded
Freewheel vs cassette and brake interface identified
Battery space measured; the mount can bear the weight
Electrical match confirmed: voltage, BMS current, controller, charger, connectors
Motor position chosen for your terrain; torque arm planned for powerful hubs
Intended use is legal where you’ll ride — 250W / 15.5 mph for public roads
Start by comparing the kit-and-battery collection and checking the FAQ page before ordering — KirbEbike motor wheels support standard six-bolt disc rotors and rim brakes, but the exact product, frame clearance and brake setup still need confirming.
Conclusion: A Good DIY E-Bike Starts With Compatibility
A conversion kit keeps a bike you trust and gives you control over motor, battery and range — but it isn’t automatically cheaper once repairs, tools and safety upgrades are counted. Front hubs prioritise simple fitting, rear hubs offer familiar traction, and mid-drives use the bike’s gears for hills. Wheel diameter alone never establishes compatibility: the dropout, axle, brake, drivetrain and battery measurements come first.
UK public-road conversions must meet EAPC rules; high-power systems belong in a separate private-land category with stronger mechanical and electrical preparation. Battery quality and correct charging matter as much as motor performance. The safest DIY route is simple: choose a sound donor bike, use a complete matched system, and get fit support before you order — not after the parts arrive.
Build It Right: Fit First, Then Power
Inspect the donor bike, measure the wheel, dropouts, brakes and battery space, then match a complete system to it.
It can be, when you already own a compatible, well-maintained bike and the kit includes a suitable battery. Add tools, repairs, brake upgrades and installation labour before comparing the total with a complete e-bike.
What is the cheapest conversion kit?
Friction-drive and basic hub kits are often the lowest-cost options, but purchase price alone doesn’t show total cost. Battery quality, included parts, warranty, compatibility and replacement support matter more than the lowest listing price.
What is the best bike to convert?
A well-maintained hybrid, commuter or hardtail mountain bike with common standards, strong brakes and secure battery space. Correct fit and condition matter more than the category.
What are the disadvantages of a conversion?
Added weight, installation work, compatibility problems, separate warranties, extra brake and tyre wear, cable clutter, and less integrated handling than a purpose-built e-bike.
What is the simplest conversion kit?
A complete motor wheel with a matched battery, controller and labelled plug-in harness. The fork or frame must still be checked for axle, brake and torque compatibility.
How fast can an e-bike motor go?
Assisted speed depends on the motor’s design and electronic limits. A UK-compliant EAPC must stop assisting above 15.5 mph, although you can pedal faster without assistance.
Should I buy an e-bike or a conversion kit?
A kit when your bicycle is suitable and customisation matters; a complete e-bike when you want factory integration, one warranty and no installation work.
What should I avoid when buying a kit?
Untraceable batteries, vague compatibility claims, mismatched components, unsupported speed claims, missing instructions, and high-power systems sold without brake, frame or torque-arm guidance.
How long does a converted e-bike last?
Years, when properly installed and maintained — but there’s no universal lifespan. Battery condition, mileage, weather, load, power level and spare-part access all affect longevity.
⚖️
A note on safety & legality. This guide is general information, not a substitute for each manufacturer’s fitting instructions or a professional assessment of your bike. Buy batteries and chargers only from reputable sources, use the correct charger, and never fit an unsafe, damaged or incompatible pack (London Fire Brigade). In the UK, a converted bike is only a road-legal EAPC when the motor is 250W continuous, assist cuts off at 15.5 mph and it requires pedalling; anything beyond that is for private land only — and a display limit does not change a motor’s continuous rating.
Park Tool — bicycle repair help library. parktool.com
About this guide. Author: KirbEbike Editorial. Technical review: KirbEbike conversion-support team. Last reviewed: July 2026. Methodology: compatibility, legal and safety statements cross-checked against UK government and fire-safety guidance, standard mechanical procedures and KirbEbike’s published product range, with authoritative references cited inline; product specifications and prices checked on live pages in July 2026 and can change. Competitor entries are unlinked and factual. Confirm current details on the linked pages before ordering.
Stay in the know
Conversion guides, fitting advice and the deals worth knowing about. No spam.