E-Bike Conversion Kit for Step-Through Bikes: Battery Placement, Frame Space and Handling
KE
KirbEbike Editorial
Reviewed by the KirbEbike conversion-support team
Delen
Unlock £10 off today
Op deze pagina
On a step-through, the battery decides the build. The low, open frame that makes the bike easy to mount also removes the space most conversion kits assume, so where the pack goes shapes handling, access and which motor makes sense. This guide works through battery placement, frame space, motor position and legal power in the order that avoids the expensive mistakes — plan the battery first and the motor second.
⚖️
Legality at a glance, checked 30 July 2026. In Great Britain, only a motor rated at no more than 250W continuous may form part of an EAPC, and only if the completed bicycle meets every other requirement. Higher-power systems do not qualify as ordinary EAPCs and are for private land with the landowner’s permission.
The Quick Answer
Many conventional step-through bikes convert well — sound frame, compatible open dropouts, serviceable brakes and an approved battery position. But the answer is decided by your individual axle, fork, brake and mounting measurements, not by the frame style. Plan the battery first and the motor second, and measure the space inside the frame with a full-size template before ordering anything. Usually not a fit: a carbon frame or fork, a thru-axle rear frame where the hub kit needs open slotted dropouts, a cracked or corroded frame, or any bike with no approved battery position that keeps the step-over clear. If a pack fits low on the down tube or in the triangle, take it; if not, a rack rated for the load is the usual answer, accepting a more rear-heavy feel. Whatever you choose, the step-over gap has to stay clear — that is the whole point of the frame.
Weight you can live with is the goal. A converted bike still gets lifted over kerbs and onto racks — where the battery sits decides how that feels.
Quick Answer: Can a Step-Through Bike Be Converted?
Decision
Usual answer
Why
Check first
Can it be converted?
Usually yes
Wheels and dropouts are often conventional
Frame condition and wheel size
Best battery position
Low and central if it fits
Keeps the centre of gravity down
Template the real space
Fallback position
Rated rear rack
Most low-step frames lack triangle room
Rack load rating
Best motor position
Front or rear hub
No bottom-bracket work needed
Fork or dropout standard
Best power tier
250W
Lighter, and the only road-legal option
Route gradient and load
Non-negotiable
Keep the step-over clear
It is why you own the bike
Pack and cable routing
Tendencies for a sound low-step donor.
Plan the battery, then the motor. On a step-through the pack placement is the constraint everything else works around.
Why Step-Through Frames Need a Different Conversion Plan
Three things separate a low-step frame from a diamond frame. There is less internal space, because the missing or dropped top tube removes the triangle most down-tube batteries are designed for. The structural layout differs, with loads carried through a single large-diameter down tube or twin lower tubes rather than a closed triangle, so mounting points are fewer and more specific. And access must stay open: a pack, bracket or cable that crosses the step-over gap defeats the frame’s purpose for anyone who chose it for a hip, knee or skirt-friendly mount.
None of that rules out a conversion. It changes the order of decisions. Work through the frame, brakes and battery space before you look at motors, and treat a kit that assumes a full triangle as a kit for a different bike.
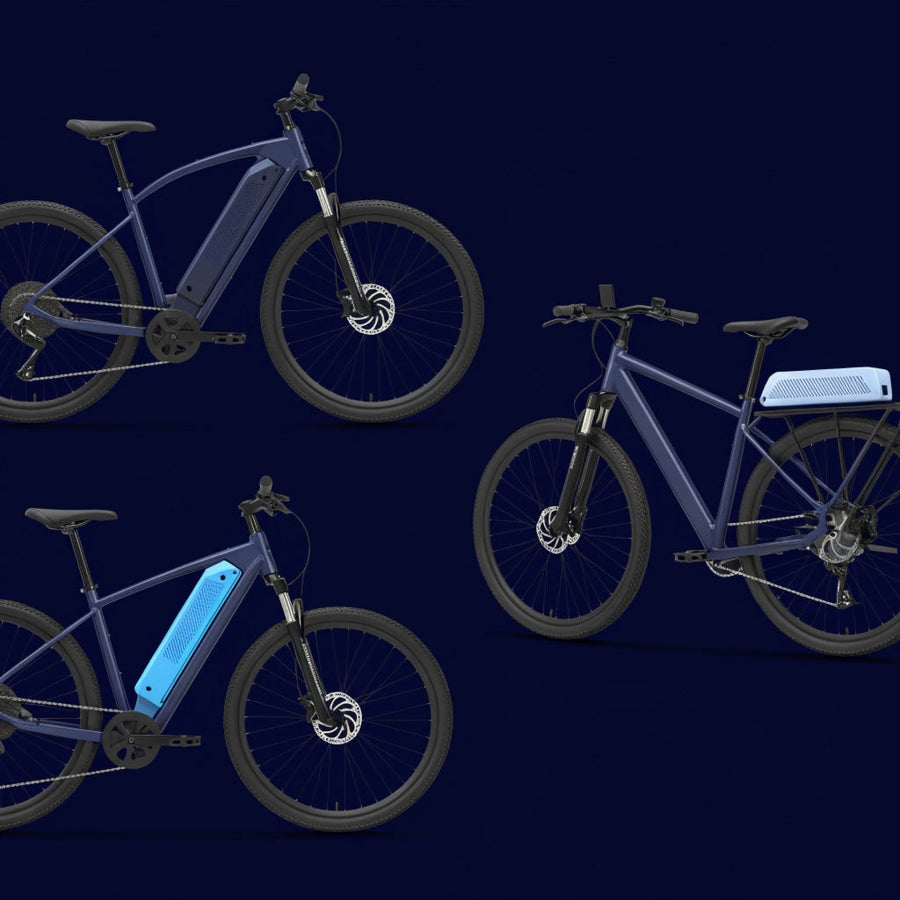
Down-Tube Battery vs Rear-Rack Battery
Factor
Down-tube pack
Rear-rack pack
Weight position
Low and central
High and rearward
Handling effect
Least
More rear-heavy, slower to steer
Frame requirement
Bosses or a rated clamp
A rack rated for the load
Fit on low-step frames
Often tight or impossible
Usually available
Removal
Depends on clearance
Usually easy
Cargo interaction
Leaves the rack free
Competes with panniers
Step-over access
Unaffected if mounted low
Unaffected
The core trade-off on a step-through.
Choose the down tube when the pack physically fits with clearance to the cranks and front tyre, the frame has bottle bosses or takes a rated clamp, and you can still lift the battery out. Choose the rear rack when the triangle is too small or oddly shaped, when the frame has no usable central mounting point, or when you want the simplest install. Never force a pack into a space that only just admits it, and never mount to a rack whose stated load will be exceeded by the battery plus anything else you carry — a generic rack is not suitable unless its load rating and battery cradle interface are both confirmed.
Measure the Installed Outline and the Removal Path
A pack can fit inside the frame outline and still be impossible to slide off its rail. Both measurements are needed, and the second is the one buyers forget.
What to reproduce at full size
Why it decides the order
Case outline — length × width × height
The installed footprint. Reproduce it on card and offer it into the frame, rather than judging from a photograph.
Mounting rail or bracket footprint
The rail adds height and needs its own fixing centres. A pack that fits the triangle may not fit once the rail is under it.
Fixing-point requirement
Bottle bosses at the correct spacing, or a rated clamp. Confirm the frame actually has them before ordering.
Connector and cable exit
The cable needs a bend radius and a route that avoids the cranks, tyre and step-over.
Removal direction and slide-off clearance
Most rail-mounted packs slide off along the rail axis. That needs extra clear space beyond the installed outline — usually the full case length again. Check it against the frame, cranks and any rack.
Step-over clearance with everything fitted
Pack, bracket and cables must all stay out of the step-through gap. This is the whole point of the frame.
Reproduce the exact case and rail dimensions at full size, then confirm crank, tyre, cable and slide-off clearance before ordering. Case dimensions and rail footprints differ between the published battery options with charger included and are not stated per variant for every option — request the drawing for your chosen battery from KirbEbike support rather than measuring from a product photograph.
Two further options exist, both with a firm limit. A seat-tube pack sits mid-height and can work when the down tube is unusable, though it often conflicts with a dropper or rear rack and puts weight further back than ideal. A triangle or frame pack can suit frames without conventional bosses — but only using a battery case, cradle and mounting method approved for that pack and the riding load, with verified load rating and clearance.
🛑
Battery retention and enclosure are safety-critical. Use only manufacturer-approved cases, cradles and mounting hardware, fitted to the manufacturer’s instructions with rated fasteners into designed mounting points, as the statutory lithium-ion battery guidelines expect. Excluded outright:
Loose or unenclosed cells
Improvised soft-bag, strap, bungee or cable-tie mounting as the primary retention method
Any arrangement where the pack can shift, rotate or contact a moving or hot part
A heavy lithium-ion pack takes vibration, impact and water, and a soft bag is not a mount. If a custom pack or a non-standard position is genuinely necessary, have it designed, assessed and installed by a qualified specialist — not improvised at home.
Avoid handlebar mounting for anything but a small pack, because weight on the steering axis has an outsized effect.
How Battery Placement Changes Handling
Where the weight sits: lower and more central handles better
Approximate height of the battery’s mass above the ground for a typical low-step commuter — indicative, not a measurement of a specific bike. Teal = low and central, least effect on handling; blue = mid height to high or far back, most effect. Fore-and-aft position matters as much as height: a rear-rack pack adds both.
Down tube / bottle bosses
~34 cm
Frame bag, low in triangle
~40 cm
Seat tube
~52 cm
Rear rack
~72 cm
Handlebars
~98 cm
A low, central pack keeps the centre of gravity near where the bike was designed to carry it, so steering, braking and balance stay close to standard. Raise it or move it back and the bike turns more slowly, the front wheel carries less weight and the rear tyre takes more. On a rear rack that is worth planning for rather than fearing, and it shows most when walking or lifting the bike.
Measuring the Change on Your Own Bike
The engineering expectation above is directional. What it does not tell you is how much your bike changes, and that is measurable with bathroom scales in about ten minutes. Record it before and after, because the difference is what you will actually feel.
Record
Before conversion
After conversion
Type
Battery position
—
Down tube, triangle or rack
Fact
Pack mass
—
Weigh it
Measured
Complete fitted mass
Weigh the bike
Weigh it again with kit and pack
Measured
Front wheel load
Front wheel on the scales, rear on a block of equal height
Repeat identically
Measured
Rear wheel load
Rear wheel on the scales, front on the block
Repeat identically
Measured
Front/rear balance
Front load ÷ total
Front load ÷ total
Calculated
Walking and lifting the bike
Note how it feels alongside you and onto a rack or kerb
Repeat the same manoeuvres
Subjective
Low-speed steering
Slow turn, U-turn, setting off from a stop
Repeat the same manoeuvres
Subjective
Keep measured figures and subjective observations separate — they carry different weight. This table is a template for your own build; KirbEbike has not yet published measured axle-load figures for a step-through installation.
One published data point is worth citing on the handlebar case: an independent magazine test of a bar-mounted 2.06kg pack found it accelerated the turn enough that the front wheel wanted to tuck in on a sharp change of direction. Small pack, big lever — height and the steering axis multiply weight’s effect.
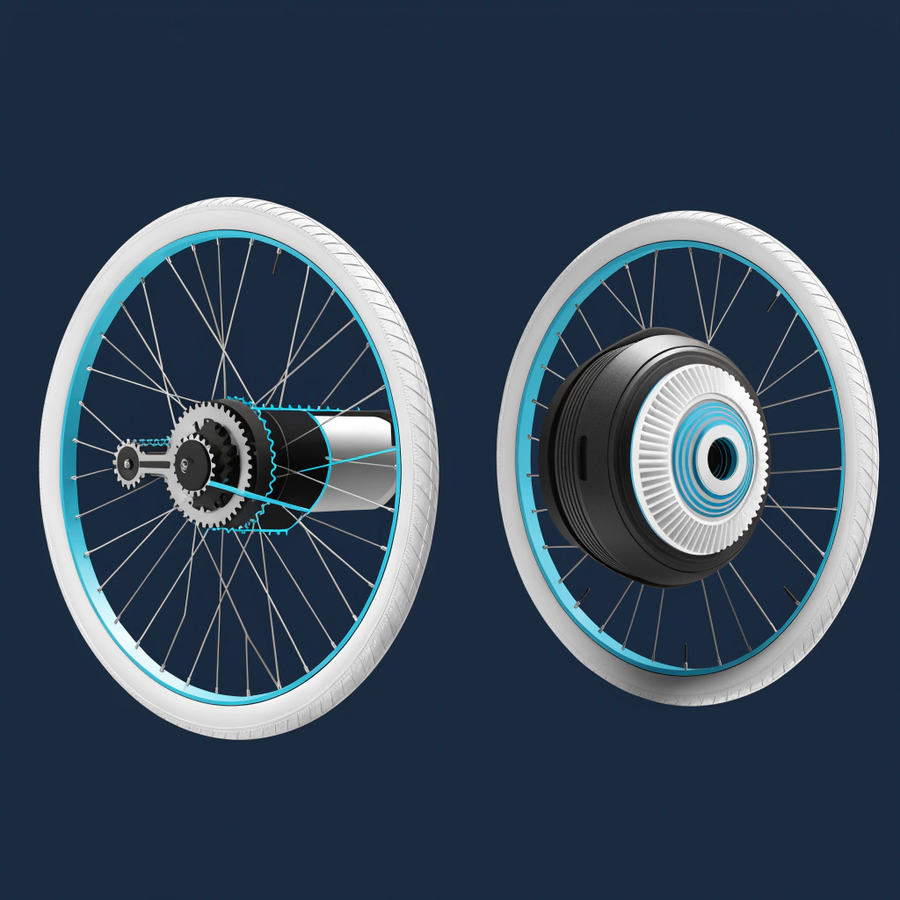
Front Hub vs Rear Hub vs Mid-Drive for a Step-Through Bike
Route
Suits a step-through when
Main benefit
Main caution
Front hub
The fork is steel or approved, 100mm open dropouts
Leaves the rear wheel and gears alone
Less traction; fork carries the torque
Rear hub
Rear dropouts are open, gearing identified
Better traction and a familiar feel
Adds weight where a rack pack already sits
Mid-drive
The bottom bracket is threaded and accessible
Keeps weight low and central
Low-step frames often crowd the BB area
Layout is a separate decision from battery placement, but the two interact.
The interaction matters more here than on a diamond frame. If the battery has to live on the rack, a front hub balances the bike better than a rear hub, because the motor weight goes to the end that is now light. If the pack fits low and central, a rear hub is the stronger choice for traction. A torque-sensing mid-drive kit keeps mass lowest of all and leaves your wheels untouched, but many low-step frames route tubes or cables tightly around the bottom bracket, so clearance needs checking before anything else.
Battery Fit, Mounting and Cable Routing
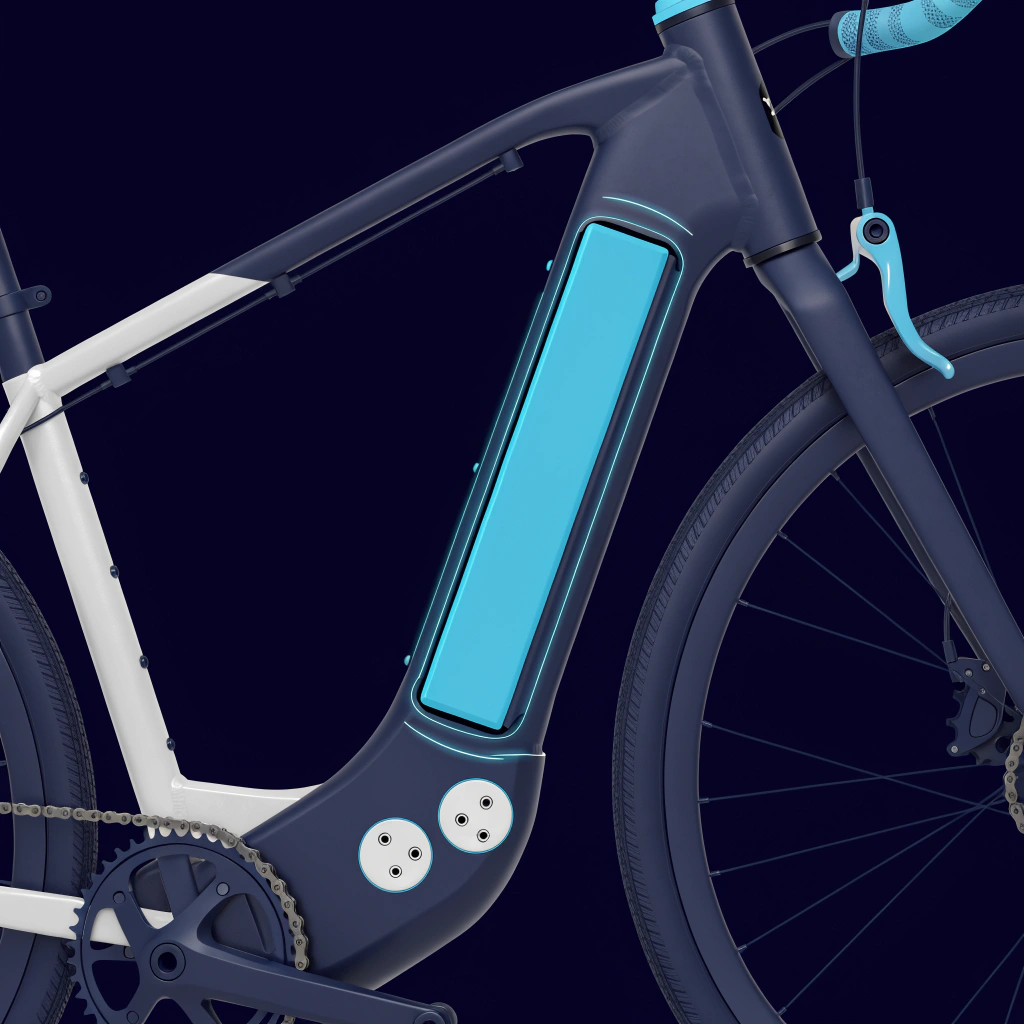
Low and central, in an approved cradle. The position to aim for when the frame allows it — mass sits where the bike was designed to carry it.
Use the manufacturer’s exact case dimensions, not a photograph, and add the mounting rail to them. Then cut a full-size cardboard template of the case plus rail, connector and key access, and offer it up to the frame with the bars turned fully and any suspension compressed. Check you can slide the pack out completely, not just unlock it, and confirm nothing crosses the step-over gap.
On mounting: bottle bosses are the cleanest route where the frame has them and the manufacturer approves the load. A rated clamp or adapter plate is next best, spreading load across the tube rather than pinching it. A rear rack must be rated for the battery plus cargo, and anti-rotation support matters on any clamped mount, because vibration works fasteners loose over months. Our alloy battery mount is the approved hardware for KirbEbike packs; the principle either way is that two light-duty bosses alone are not a mount.
Put the controller somewhere protected and ventilated, not against the tyre or under the pack where heat collects, and route cables clear of the steering, tyre, rotor and cranks at full lock and compression. Leave a service loop and secure with proper clips, not tape.
Wheel, Dropout and Brake Checks
Confirm wheel size from the tyre marking rather than the label, because the inch number is only a rough code for outside diameter (Park Tool’s fit standards). Step-throughs commonly run 700C, 26 or 27.5-inch wheels, and 20-inch on folders. Then measure dropout spacing and identify the retention system: most conversion motors need open slotted dropouts, so a closed thru-axle frame needs a purpose-built motor (Park Tool’s wheel removal guide shows the difference). Our published wheel and dropout sizes cover the measurements, and for a rear hub identify freewheel or cassette first.
Brakes deserve particular attention on these bikes. Many low-step commuters ship with modest rim or mechanical disc brakes, and a conversion adds motor and battery weight while raising average speed. Check pad thickness, rim or rotor wear, lever feel, cable or hose condition and caliper alignment, and fit a motor cut-off so power stops the instant you brake. There is a step-through-specific point too: riders who chose the frame for limited mobility often brake later and put a foot down sooner, so predictable, low-effort braking matters more than peak power.
Frame Strength, Rack Load and Carrying Things
Inspect the frame before committing: no cracks at welds or dropouts, no bent fork, no deep corrosion, no undocumented repair. Then think about total system weight, because a low-step frame carries load differently from a triangle and a rear-rack battery concentrates it high and behind the seatpost. Some flex under load is normal and not the same as structural failure, but a frame that visibly moves or creaks under the pack needs a professional opinion before you ride it. On higher-power builds a torque arm matters as much as the frame — the dropouts were never designed to react a motor’s axle torque alone.
If you carry panniers, a child seat or shopping, add the battery weight to the cargo and compare the total against the rack’s stated limit, not a guess. Keep heavy items low in the panniers rather than piled on top, check heel clearance against the pack and any bags, and confirm the wheel still clears everything through full suspension travel. A centre-stand or double-leg kickstand copes better than a single side-stand once a rack battery is fitted.
Best Power Level for a Step-Through Conversion
250W usually suits these bikes best. They are commuter frames ridden on roads and paths, the lighter motor and smaller pack are easier to mount in constrained space, and 250W continuous is the only rating that can qualify as an EAPC in Great Britain, alongside working pedals and assistance that stops at 15.5mph (GOV.UK electric bike rules). More power is not simply better here: it adds motor and battery weight to a frame with fewer mounting options, raises braking demand, and pushes the build off public roads. Our road-legal 250W range covers the compliant route; anything above 250W is for private land with the landowner’s permission.
Kits to Compare for a Step-Through Bike
A converted KirbEbike build with a rear-mounted removable pack. Shown for mounting context — every field in the table below still needs confirming against your own frame.
Every system below is assessed against the same step-through criteria, with each field labelled by source. None of these figures comes from a first-hand installation on a common step-through donor, so treat the table as a shortlist tool and confirm each field on the supplier’s own page before buying.
System
Complete fitted weight
Battery format and removal path
Axle / fork requirement
Mounting requirement
Assistance method
Legal category
Boost
Not published per configuration
Bottle-style frame pack; removal along the cage axis
Open dropouts, rear hub
Bottle bosses or rated clamp
Pedal assist
250W route
Cytronex
Not published per configuration
Bottle-cage pack; lifts from the cage
Front fork, check approval
Bottle bosses
Pedal assist
250W route
KirbEbike 250W front
Not published per configuration
Selected matched options; depends on pack chosen
Open slotted fork dropouts
Depends on pack and frame
Pedal assist
250W route
KirbEbike EZ Rider
Live page conflicts — see the fit box below
Dual pack, 7Ah + 15Ah
Open slotted fork dropouts, 100mm
Both packs need approved positions
Pedal assist
250W route
KirbEbike MTX rear
Not published per configuration
Multiple pack variants
Open slotted dropouts, 135–142mm
Depends on pack and frame
Pedal assist and throttle
Above 250W — not an ordinary EAPC
Swytch
Not published per configuration
Bar or strap-on frame pack
Front fork slot and crank type
Bar mount or frame strap
Pedal assist
250W route
Listed alphabetically. All fields: desk research from the supplier’s published specification, 30 July 2026 — not a first-hand installation. “Not published per configuration” means the supplier does not state a single complete fitted weight — ask before ordering. Competitor systems are named for comparison only; confirm current specifications, prices and warranty terms on each supplier’s own page.
KirbEbike
The 250W front-wheel kit leaves the rear wheel and gears intact, which helps when a rack battery already loads the back. The 500W/750W MTX rear-hub kit is the higher-power option, and it does not qualify as an ordinary EAPC at full rating. Stated plainly: these hub kits need open slotted dropouts, so a thru-axle step-through is not served, and battery mounting still depends on your frame having a usable position, which our range cannot guarantee for every low-step design. Both carry a 1-year warranty.
⚠️
EZ Rider on a step-through: specification not yet reconciled. The EZ Rider kit bundles a 250W front motor with a dual pack (36V 7Ah + 15Ah, 22Ah total), charger and colour display. A dual-battery system can solve range while making the space constraints this article is about worse, because it needs two approved mounting positions rather than one. Its live page currently gives two different system weights — 3.8kg in the specification list and 6.0kg all-in with both batteries — and a step-through fit for both packs has not been published. We are not recommending it as a step-through solution until a compatible installation example is available: confirm both pack outlines, their attachment points and the complete fitted weight against your individual frame with support before ordering.
Boost
A UK-built 250W rear hub with a 252Wh bottle-style pack and one cable, and its configurator asks for axle type first, offering 130/135mm open dropouts plus a 142mm thru-axle option that most conversion kits lack. The relevant caution is that its bottle-style pack still needs suitable central tube space, which is exactly what many low-step frames lack; where it fits, a rear motor with a central battery balances better than a rear-rack pack.
Swytch
The lightest route and the most flexible on mounting: the universal kit offers handlebar-mounted AIR and MAX packs or a frame-mounted GO pack that straps almost anywhere, up to 378Wh on the GO++, across 13 wheel sizes. That strap-anywhere flexibility genuinely helps on an awkward frame. Two cautions from Cycling UK’s test: the motor needed a 10mm fork dropout slot where many bikes have 9mm, and the pedal-sensor disc would not fit a Hollowtech II crankset — check both before ordering.
Cytronex
The most relevant option for a frame with little central space, because its pack mounts in a bottle cage rather than needing a full triangle. It is a 250W front hub with a measurement-based compatibility process covering fork material and dimensions. It sits at a premium price and is a road-legal proposition rather than a powerful one.
What Does It Cost, and Should You Just Buy Complete?
Factor
Conversion kit
Complete step-through e-bike
Reuses your bike
Yes
No
Battery position
Limited by your frame
Engineered in
Upfront cost
Usually lower
Higher
Warranty
Split between bike and kit
Often one product
Handling
Depends on where the pack goes
Designed around the pack
The battery question is what usually decides this one.
Budget the whole project rather than the motor: the kit, battery and charger, mounting hardware, a rack if you need one, fitting labour, any brake or tyre work, and a follow-up service once fasteners settle. Converting makes sense when the bike fits you, the frame is sound, a sensible battery position exists and repairs are modest. Buying complete makes more sense when no safe pack position exists at all, the frame needs significant work, or you want the handling designed around the battery rather than worked around it.
Common Step-Through Conversion Mistakes
A down-tube pack, mounted low. Shown on a diamond frame — the position most step-through builds have to work harder to achieve, which is why measuring comes first.
Mistake
Why it costs you
Ordering the battery before measuring
Low-step frames rarely fit a standard down-tube pack
Blocking the step-over gap
It removes the reason you chose the frame
Mounting to unrated bottle bosses
Two light-duty bolts are not a battery mount
Exceeding the rack load rating
Battery plus cargo adds up faster than expected
Ignoring where the weight sits
High and rearward changes steering and braking
Assuming any hub motor fits
Closed thru-axle dropouts will not take a bolt-on axle
Skipping the brake check
More weight and speed on modest commuter brakes
Choosing power before position
The battery space limits the practical build
Final Step-Through Conversion Checklist
Frame and fork sound: no cracks, bends, deep corrosion or undocumented repair
Battery space confirmed with a full-size template, including removal clearance
Step-over gap clear of pack, bracket and cables
Mounting rated: bosses, clamp or a rack whose limit covers battery plus cargo
Wheel size read from the tyre, dropout spacing measured, axle type identified
Rear gearing identified as freewheel or cassette, derailleur and rotor clearance checked
Brakes serviceable, motor cut-off fitted, and the battery matched to the controller’s voltage and current
Power level legal for where you ride, and the ride-ready total costed
Product touchpoint
Getting the battery position right first
On a step-through this is the decision that shapes everything else. Template the space, check your dropouts against the published wheel and dropout sizes, then shortlist kits. If no central position works, a front hub with a rack pack keeps the weight better balanced than a rear hub — and if your frame is thru-axle, our open-dropout hub kits will not fit, so say so when you ask.
A step-through converts well when you accept that the frame, not the kit catalogue, sets the terms. Measure the real space with a template, choose the lowest and most central battery position that genuinely fits, and keep the step-over gap clear. Only then pick the motor, favouring a front hub if the pack has to sit on a rack and a rear hub if it does not.
For most riders a documented 250W system on a sound frame with serviceable brakes is the right answer, because it stays road-legal, adds least weight and asks least of the mounting points available. Use only a charger matched to your pack, as GOV.UK’s battery safety guidance and the London Fire Brigade both stress, and confirm any uncertain measurement with the supplier in writing before ordering.
Frame first, battery second, motor third
That order avoids the most expensive mistake on a low-step conversion.
Can you convert a normal step-through bike into an e-bike?
Usually yes. The wheels, dropouts and brakes are often conventional. The limiting factor is battery space, so measure the frame with a full-size template before ordering.
Where should the battery go on a step-through bike?
As low and central as it genuinely fits, on the down tube or in the triangle. Where there is no room, a rack rated for the load is the usual answer, accepting a more rear-heavy feel.
Does a rear-rack battery affect handling?
Yes, though it is manageable. It sits high and behind the seatpost, so the bike steers more slowly, carries less weight on the front wheel and feels heavier when walked or lifted.
How much does it cost to convert a step-through bike?
Cost the whole project: kit, battery and charger, mounting hardware, a rack if needed, fitting labour, brake or tyre work and a follow-up service. Compare that total against a complete e-bike.
What are the disadvantages of converting a step-through bike?
Limited battery positions, a more rear-heavy feel if the pack goes on a rack, added weight on modest commuter brakes, visible wiring, split warranties and more responsibility for safety.
How much clearance does a removable battery need on a step-through frame?
More than the pack itself. Most rail-mounted packs slide off along the rail, so you need the installed outline plus roughly the case length again as clear space in the removal direction — checked against the cranks, front tyre, any rack and the step-over gap. Bottle-style packs lift out and need clearance above instead. Reproduce the case and rail at full size on card and try the removal movement before ordering.
A note on safety & legality. General information, not a substitute for the frame, rack or kit manufacturer’s instructions. Never exceed a rack’s stated load, never mount a battery on unrated fittings, and use only the charger supplied or authorised for your pack. In Great Britain a converted bike is a road-legal EAPC only when the motor is 250W continuous, assistance cuts off at 15.5mph and it requires pedalling; higher-power kits are for private land with permission.
About this guide. Author: KirbEbike Editorial. Technical review: KirbEbike conversion-support team. Last reviewed: 30 July 2026. Methodology: legality and battery safety cross-checked against GOV.UK and London Fire Brigade guidance, component standards against Park Tool, and front-hub fork and crank compatibility against Cycling UK’s published test; all cited inline. The battery-height chart is an indicative estimate for a typical low-step commuter, not a measurement of any specific bike. Competitor specifications were read from each supplier’s live page on 30 July 2026 and can change. Confirm any uncertain measurement in writing before ordering.
Stay in the know
Conversion guides, fitting advice and the deals worth knowing about. No spam.
Door je aan te melden ga je akkoord met ons Privacybeleid.