The best e-bike conversion kit is the one that fits your bike, route and legal use—not simply the one with the largest wattage number. For road commuting in Great Britain, start with a correctly marked 250W pedal-assist system that cuts assistance at 15.5mph. For steep private-land or off-road use, a mid-drive or higher-power hub system may be more suitable, but it falls outside normal EAPC treatment and requires a stronger donor bike, brakes and installation standard.
This guide separates the main kit types, explains the specifications that affect real-world performance and provides a compatibility checklist before you spend money. Recommendations are based on published specifications and use cases; claimed range and installation times are identified as manufacturer claims rather than independent laboratory results.
Best e-bike conversion kit by use case
| Your priority |
Best starting point |
Why |
Main compromise |
| Road commuting |
250W geared hub kit |
Simple, quiet and compatible with EAPC power limits when correctly configured and marked |
Less climbing leverage than a mid-drive |
| Easy home installation |
Front-hub wheel kit |
Leaves the chain and rear gears largely untouched |
Front-wheel traction and fork compatibility need care |
| Natural pedal feel |
Torque-sensing mid-drive |
Responds to pedal effort and uses the bicycle’s gears |
More complex installation and drivetrain wear |
| Steep hills or cargo |
Mid-drive matched to load and gearing |
Gear reduction helps the motor operate efficiently on climbs |
Correct shifting technique and stronger drivetrain parts matter |
| Low-maintenance general riding |
Rear-hub kit |
Good traction with independent motor drive |
Cassette/freewheel and dropout compatibility are more involved |
| Long range |
Efficient kit with a larger Wh battery |
Battery energy, not motor wattage alone, determines potential range |
More capacity adds weight and cost |
| High-power private-land use |
Direct-drive rear hub or suitable mid-drive |
Higher sustained output and thermal capacity |
Not an ordinary EAPC; frame, brakes and legal status require serious attention |
Start with the legal use, not the motor size
In Great Britain, an electrically assisted pedal cycle (EAPC) must have pedals that can propel it, a motor with maximum continuous rated power no greater than 250W, and assistance that cuts off at 15.5mph. Required manufacturer, power, voltage or speed markings also apply. A compliant EAPC can be used where ordinary cycles are permitted without registration, tax or insurance.
If a converted bike exceeds those limits, it is treated as a motor vehicle rather than an ordinary cycle. The Department for Transport also states that an “off-road” mode capable of propelling the vehicle above 15.5mph does not, in its opinion, comply with EAPC rules. Software limiting does not automatically turn a motor rated above 250W into a compliant 250W EAPC.
Check the official rules for riding an electric bike and the detailed DfT EAPC guidance. Northern Ireland has separate guidance.
Front hub, rear hub or mid-drive?
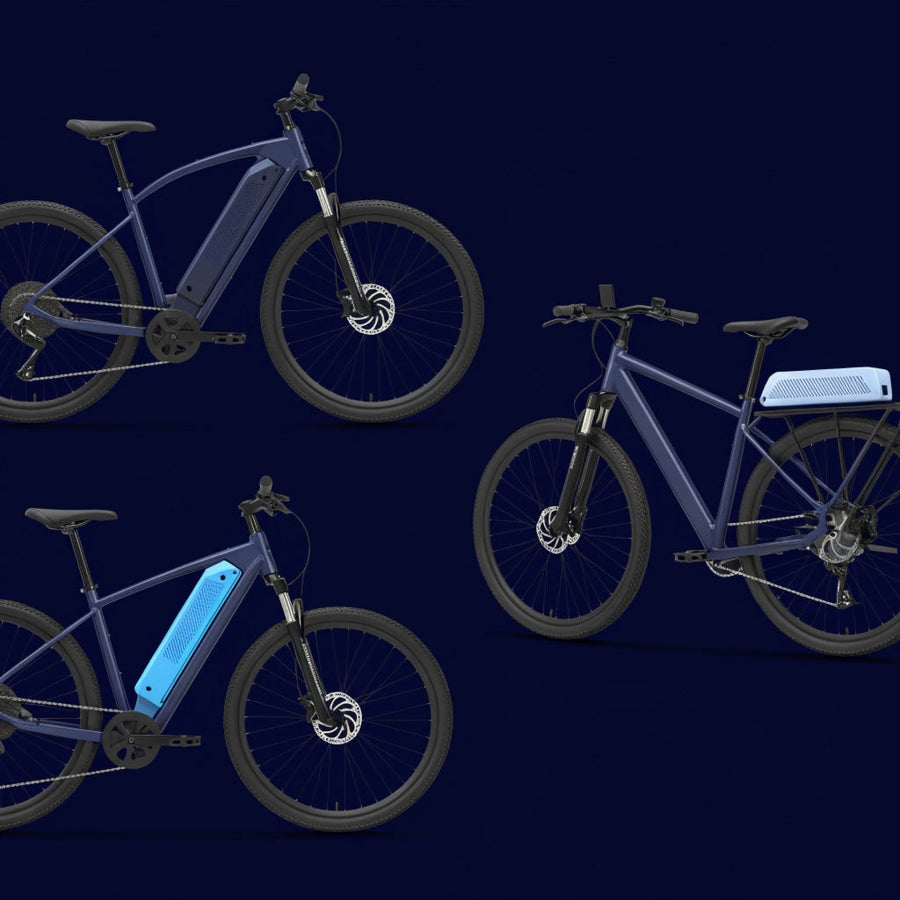
Front-hub conversion kits
A front-hub kit replaces the front wheel with a motor wheel. The chain, rear gears and most of the drivetrain remain unchanged, making it the most approachable design for many home conversions.
Best for: commuting, hybrids, city bikes, folding-bike variants and riders who value a straightforward installation.
Check carefully: fork dropout width, axle flats, fork material, disc-rotor clearance and whether the supplier requires a torque arm. Front motors can spin more easily on wet gravel or steep loose surfaces, so they are not automatically the best choice for technical trails.
Rear-hub conversion kits
A rear-hub motor puts drive through the rear wheel, where rider weight normally gives better traction. It keeps motor power independent of the chain, so a broken chain does not necessarily remove electrical drive.
Best for: general road riding, more powerful hub systems, cargo use and riders who prefer rear-wheel traction.
Check carefully: rear dropout width, cassette versus screw-on freewheel, number of gears, disc mount, derailleur alignment and axle seating. Rear installation is usually more involved than a front wheel swap.
Mid-drive conversion kits
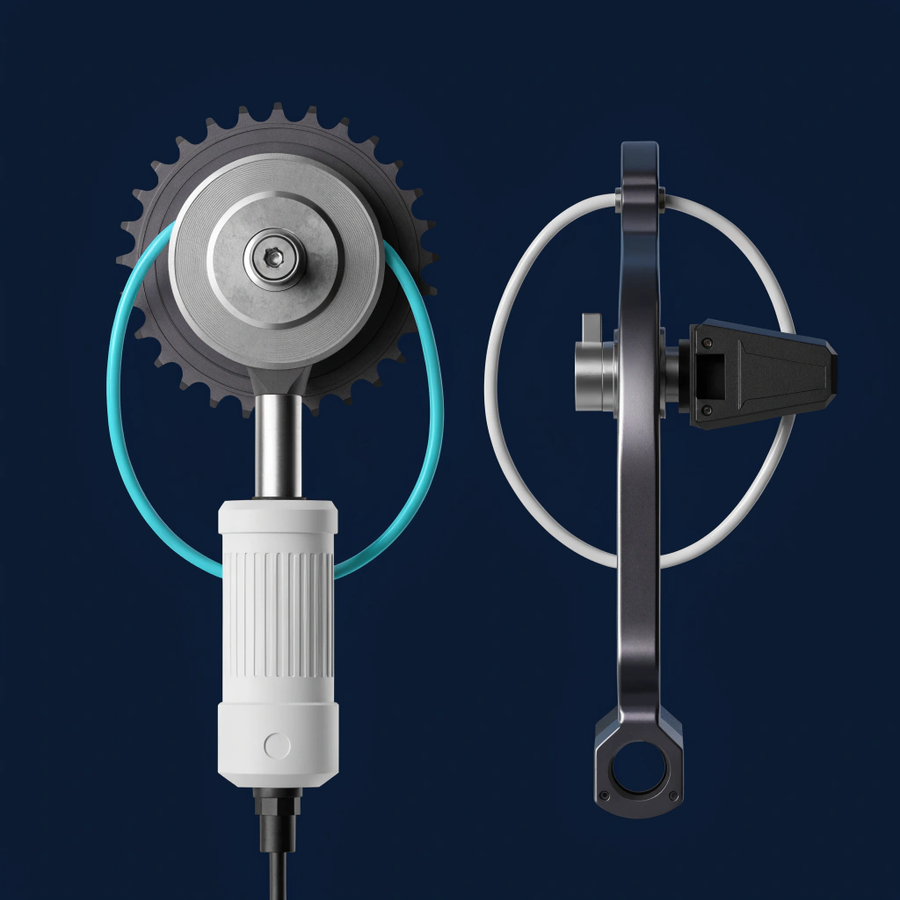
A mid-drive replaces the crank area and drives through the bicycle’s chain and gears. Bafang and Tongsheng are well-known motor-platform families in this category. A mid-drive can keep the motor in an efficient speed range on steep climbs by using lower bicycle gears.
Best for: sustained hills, cargo bikes, technical off-road riding and riders who prefer central weight distribution.
Check carefully: bottom-bracket shell width and diameter, cable routing, chainline, frame clearance and brake performance. Installation requires crank and bottom-bracket tools. Extra torque also increases wear on the chain, cassette and chainring, especially under poor shifting technique.
This is often presented as a brand comparison, but it is really a choice between two product architectures.
| Option |
What it is |
Best reason to choose it |
What to verify |
| KirbEbike EZ Rider |
Current 250W front-hub package with twin 36V batteries, display and charger |
High included battery capacity and a complete commuting-oriented package |
100mm universal fork or 74mm Brompton option, wheel size and battery space |
| Swytch MAX / GO |
Lightweight 250W hub system with handlebar- or frame-mounted battery choices |
Low total weight and compact, modular power-pack options |
Exact wheel/axle option, pack size, display extras and final configured cost |
| Bafang mid-drive family |
Bottom-bracket motor platform sold in multiple power and battery configurations |
Uses bicycle gearing for climbs and centralises motor weight |
Exact motor model, rated power, bottom bracket, chainline, battery and road-use classification |
| Tongsheng torque-sensing mid-drive |
Mid-drive platform known for pedal-torque sensing on selected models |
More proportional, bicycle-like assistance |
Model-specific reliability, firmware, installation dimensions and local support |
If your shortlist is specifically the two lightweight front-hub packages, use our detailed KirbEbike EZ Rider vs Swytch comparison. Keeping that model-to-model analysis on its own page prevents this general guide from repeating the same search intent.
How much motor power do you need?
Motor wattage is commonly used as a headline, but it does not describe the complete ride. Controller current, system voltage, motor winding, wheel diameter, gearing, thermal limits and total load all affect performance.
250W
The correct starting point for ordinary public-road EAPC use in Great Britain. A well-matched 250W geared hub is suitable for commuting and moderate gradients, especially when the rider contributes through the pedals.
500–750W
Useful in some off-road, cargo or international-market configurations, but above the 250W continuous-rated EAPC limit in Great Britain. Do not describe these motors as normal road-legal e-bike kits merely because a controller can reduce speed.
1000W and above
Designed for higher performance, heavy loads or private-land/off-road applications. At these levels, the donor bicycle, dropout retention, torque arms, wheel build, tyres and brakes become critical engineering choices. A bicycle frame that was adequate at pedal speeds may not be adequate for motor-vehicle performance.
Choose the battery by watt-hours
Battery energy is measured in watt-hours (Wh):
Watt-hours = nominal voltage × amp-hours
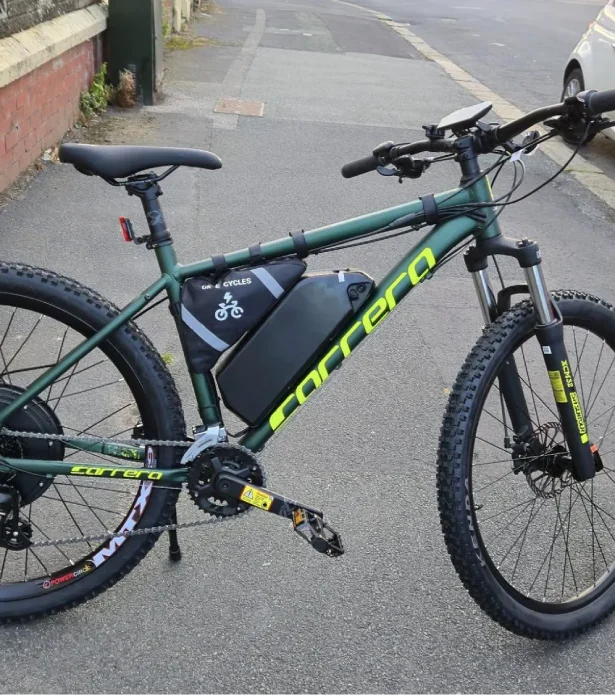
A 36V 15Ah battery is approximately 540Wh; a 48V 15Ah battery is approximately 720Wh. That does not mean the 48V pack will always travel exactly one-third farther, because the motor, controller, speed and riding conditions may also differ, but Wh is much more useful than Ah alone when comparing batteries of different voltages.
A realistic range-planning method
For early planning, many riders use a broad consumption range of roughly 10–20Wh per mile. The lower end assumes efficient assistance, rider input and favourable conditions; hills, cold weather, high speed, soft tyres and heavy loads can push consumption higher.
For example, a 540Wh battery might provide a planning range around 27–54 miles before safety margin. Treat this as a scenario, not a promise. Manufacturers may test under different conditions, so two “up to 60 miles” claims are not necessarily comparable.
For voltage selection, see the 36V vs 48V e-bike battery guide.
Battery and charger quality checks
- The battery specification clearly identifies voltage, capacity and compatible charger.
- The seller explains the BMS protections and warranty rather than relying only on cell-brand claims.
- The enclosure, mount, lock and connectors suit the intended weather and vibration.
- A replacement battery and charger remain available for the exact system.
- The charger is supplied or authorised by the battery manufacturer.
- Safety documentation, responsible-person details and required product markings are present.
The UK government warns that fire risk increases with counterfeit, damaged or poorly modified products and when the wrong charger is used. Follow its e-cycle battery safety guidance. If charging speed is part of your decision, read the 2A vs 5A charger guide.
Conversion-kit compatibility checklist
Complete this checklist before choosing a power level or battery:
-
Wheel size: record the full tyre marking and rim standard. “28 inch” and “700C” labels can hide important width differences.
-
Dropout width: measure the inside spacing with the wheel removed. Common front and rear standards differ, and folding bikes may use narrower forks.
-
Axle type: identify open dropouts, solid axle or thru-axle. Do not assume a standard hub-motor axle fits a thru-axle frame.
-
Fork and frame material: aluminium and carbon require careful supplier approval, correct torque and suitable retention hardware.
-
Brake system: check rotor pattern, rotor diameter, caliper clearance, rim-brake track and stopping condition.
-
Rear gearing: for a rear hub, identify cassette versus freewheel and confirm supported sprocket count.
-
Bottom bracket: for a mid-drive, measure shell width and confirm its type, diameter and surrounding clearance.
-
Battery space: make a cardboard template and check bottle bosses, suspension travel, cables and pack-removal direction.
-
Controller placement: allow ventilation and weather protection without crushing or tightly coiling cables.
-
Tyres and wheels: inspect spokes, rim, tyre load rating and pressure before adding motor speed and weight.
The most expensive mistakes happen when a buyer chooses the motor first and measures the bike later. Our installation mistakes guide covers dropout, wheel, freewheel/cassette and braking checks in more detail.
What should be included in a complete kit?
A low headline price can exclude parts needed for a safe, usable conversion. Compare the complete configured package:
- motor wheel or mid-drive unit;
- compatible controller;
- battery and its approved charger;
- pedal-assist sensor or torque sensor;
- display or control pad, if required;
- brake cut-off sensor where specified;
- correct wiring harness and waterproof connectors;
- mounting hardware and model-specific spacers;
- torque arm where required;
- instructions, warranty and accessible replacement parts.
Installation: what “20 minutes” leaves out
Manufacturers often publish best-case installation times for a compatible bike and an experienced installer. A first-time conversion should allow time for tyre transfer, wheel seating, brake alignment, sensor adjustment, cable routing, fastener torque and a low-speed test.
Stop if an axle does not seat fully, the wheel is not centred, a cable rubs a moving part or the brake cannot be aligned. After the first short rides, recheck axle nuts, torque arms, spokes, crank hardware and all mounts according to the instructions.
High-power systems deserve professional assessment. Stronger acceleration and higher mass raise the consequences of weak dropouts, poor wheel building or marginal brakes.
How to compare conversion-kit reviews
A useful review states the exact model, battery, wheel size, rider mass, route, temperature and assist level. Be cautious when a page:
- mixes specifications from old and current versions;
- calls a range claim a measured result without a test method;
- compares one complete kit with another brand’s entry price;
- declares a high-power motor “road legal” because it has a speed setting;
- uses anonymous testimonials that cannot be traced to verified customers;
- lists only advantages for the seller’s product and only weaknesses for competitors.
The best comparison makes the trade-offs clear. More battery means more range potential but more weight. A mid-drive climbs efficiently but increases drivetrain load. A front hub is simple but asks more of the fork and front traction.
Our recommendations
Best starting point for road commuters
A complete, correctly marked 250W pedal-assist hub kit with a battery sized for the return journey plus a sensible reserve. Prioritise fit, braking and after-sales support over a larger controller number.
Best for riders prioritising low weight
A compact 250W geared hub system with a battery matched to the daily distance. Swytch’s smaller pack options illustrate this approach; compare the final system after selecting the display and range required.
Best for riders prioritising included range
A complete kit with higher Wh capacity, such as the current twin-battery EZ Rider configuration, provided the extra battery weight and frame space suit the bike.
Best for sustained steep off-road climbs
A compatible mid-drive with appropriate gearing, battery and thermal capacity. Bafang and Tongsheng platforms offer multiple configurations, so evaluate the exact motor rather than buying by brand name alone.
Best for high-power private-land use
A robust rear-hub or mid-drive system installed on a donor bike selected for the load, with correctly engineered torque retention, wheels, tyres and brakes. Confirm where it may legally be used before purchase.
Frequently asked questions
What is the easiest e-bike conversion kit to install?
A compatible front-hub kit is usually the easiest because it leaves the rear gears and bottom bracket untouched. The wheel still needs to seat correctly, and the fork, brakes, torque retention and sensor must be checked.
Is a mid-drive better than a hub motor?
A mid-drive is often better for sustained hills, central weight and a natural torque-sensing feel. A hub motor is usually simpler, places less motor load through the chain and can be easier to maintain. “Better” depends on terrain and ownership priorities.
How large should my e-bike battery be?
Calculate Wh, estimate consumption for your route and add reserve for cold weather, ageing, hills and diversions. Buying more capacity extends range potential but adds cost and weight.
Can a 500W or 1000W kit be road legal in the UK if limited to 15.5mph?
Not as an ordinary EAPC when its maximum continuous rated motor power exceeds 250W. Speed limiting alone does not change the motor’s rated power or automatically make the vehicle an EAPC.
Do I need a torque arm?
Follow the kit manufacturer’s requirements for the exact motor, axle and dropout. Torque arms are commonly required or strongly recommended for many hub-motor installations, especially with higher torque, aluminium dropouts or powerful systems.
Can I use any charger with the same voltage battery?
No. Output voltage, chemistry, connector, polarity and approved charge current must all match. Use the charger supplied with the battery or an authorised replacement.
Final buying checklist
- Decide whether the bike is for public-road EAPC use or another legal category.
- Measure wheel, dropouts, axle, brakes, bottom bracket and battery space.
- Choose motor architecture for the route, not for the largest wattage.
- Compare battery energy in Wh and treat range as condition-dependent.
- Price the complete package, including battery, charger, controls and fitting parts.
- Check warranty, technical support and replacement-part availability.
- Plan the installation and post-installation safety inspection before ordering.
Browse the current e-bike conversion kit and battery range, then confirm compatibility with the exact product specification or the support team before purchase.