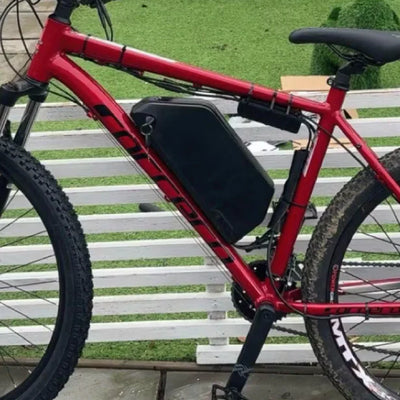
Een pauze van het fietsen betekent niet dat je een pauze neemt van de zorg voor je uitrusting. Of je je ebike ombouwkit nu opbergt tijdens de Britse winter, een pauze neemt voor vakantie, of gewoon een paar maanden wegblijft, wat je doet voordat je de fiets opbergt, bepaalt hoe goed hij presteert wanneer je terugkeert.
Verwaarloosde opslag leidt tot gecorrodeerde connectoren, verslechterde batterijen, vastzittende componenten en vastgelopen aandrijflijnen—dit alles is te voorkomen met een gestructureerde routine voor het opbergen. Deze gids behandelt alles van batterijchemie tot lagersmering, specifiek afgestemd op eigenaren van ombouwkits.
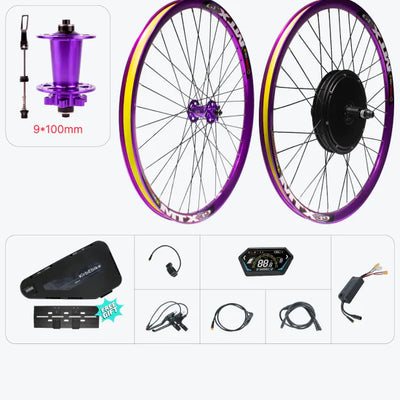
Waarom opslag buiten het seizoen belangrijker is voor ombouwkits
![]()

Standaardfietsen vergeven verwaarlozing redelijk goed. E-bike ombouwkits niet. De lithiumbatterijchemie ondergaat continue afbraak, zelfs wanneer niet in gebruik, elektrische connectoren corroderen wanneer ze worden blootgesteld aan de Britse luchtvochtigheid, en smeermiddelen drogen uit en trekken vocht aan in onverwarmde opslagruimtes.
De gevolgen van slechte opslag zijn ook niet altijd direct duidelijk. Een batterij die de hele winter volledig opgeladen is opgeslagen, kan op het eerste gezicht prima lijken, maar zal meetbare capaciteit hebben verloren voordat de eerste lentefietstocht begint. Gecorrodeerde connectoren veroorzaken intermitterende storingen die uren kosten om te diagnosticeren. Vastgelopen remkabels maken de eerste rit na de opslag echt gevaarlijk.
Klanten van Kirbebike bereiken regelmatig een buitengewone levensduur met hun kits—bijna 14.000 mijl met één 1500W kit, bijna 20.000 km met een andere—en gedisciplineerde zorg buiten het seizoen is een belangrijke factor voor zo'n levensduur.
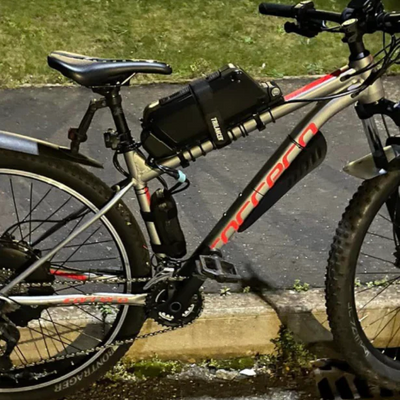
Deel 1: De reiniging en inspectie voor opslag
![]()

Berg nooit een vuile kit op. Strooizout, zand en vocht versnellen corrosie dramatisch tijdens statische opslagperioden. Een grondige reiniging voordat je de fiets opbergt, duurt 30-45 minuten en voorkomt maanden van onzichtbare schade.
Reinigingsvolgorde
De fiets en het motorwiel:
- Verwijder de batterij voor elke reiniging – nooit reinigen met de batterij geïnstalleerd
- Spoel het fietsframe, de wielen en de motorbehuizing af met een lage-druk slang of een emmer en spons (nooit een hogedrukreiniger in de buurt van elektrische componenten)
- Gebruik een zachte borstel en milde fietsreiniger op de motorbehuizing, let op het gebied van de motoras en de spaakverbindingen
- Droog grondig af met een schone doek en laat vervolgens minstens een uur aan de lucht drogen in een geventileerde ruimte
- Breng een lichte film siliconenspray of corrosiewerende spray aan op de buitenkant van de motorbehuizing, de oppervlakken van de as en de spaaknippels
De aandrijving:
- Ontvet de ketting, cassette en kettingblad met speciale fietsontvetter
- Spoel en droog volledig af
- Breng verse kettingolie aan die geschikt is voor natte omstandigheden (natte smeermiddel voor opslagomgevingen in het VK)
- Veeg overtollig smeermiddel af—geaccumuleerde olie trekt vuil aan tijdens opslag
Controlelijst voor inspectie vóór opslag
Gebruik deze gelegenheid om problemen te identificeren voordat ze zich verder ontwikkelen gedurende de winter:
|
Component
|
Wat te controleren
|
Actie bij probleem
|
|
Remblokken
|
Restdikte
|
Vervangen indien onder 1,5 mm
|
|
Banden
|
Sneden, bulten, profieldiepte
|
Vervangen indien versleten of beschadigd
|
|
Spaken
|
Spanning, eventuele breuk
|
Wiel richten, gebroken spaken vervangen
|
|
Motorkabel
|
Isolatie scheurt bij uitgangspunt
|
Siliconenkit aanbrengen indien gebarsten
|
|
Koppelarm
|
Veiligheid en boutaandraaiing
|
Opnieuw vastdraaien, schroefdraadborgmiddel aanbrengen
|
|
Controllerbehuizing
|
Integriteit afdichting, geen scheuren
|
Opnieuw afdichten met siliconen indien gecompromitteerd
|
|
Display
|
Schermconditie, kabelinvoer afdichting
|
Bedekken met beschermfolie indien los
|
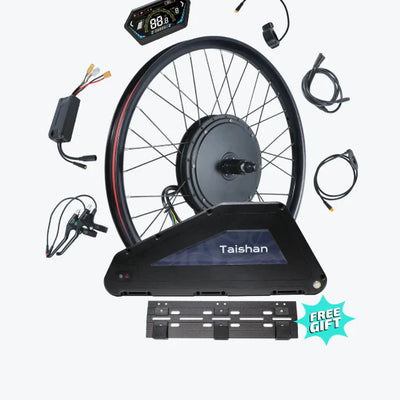
Deel 2: Batterijopslag — De meest kritieke stap
![]()

Lithium-ionbatterijen zijn het meest opslaggevoelige onderdeel in elke e-bike ombouwset met batterij. Correcte batterijopslag bepaalt direct hoeveel bereik je hebt als de lente aanbreekt.
Het oplaadniveau voor opslag
De belangrijkste regel: Bewaar een lithiumbatterij nooit volledig opgeladen (100%) of volledig leeg (0%).
Het ideale opslagniveau voor lithium-ioncellen is 40-60% capaciteit. Op dit laadniveau ervaren de cellen minimale elektrochemische stress, wat zowel de kalenderveroudering als het capaciteitsverlies tijdens de opslagperiode vermindert.
Hoe het juiste opslagniveau te bereiken:
- Als je batterij boven de 80% is wanneer je stopt met fietsen, maak dan een korte rit op een laag ondersteuningsniveau om deze tot ongeveer 50-60% te brengen voordat je hem opbergt
- Als je batterij onder de 30% is, laad dan kort op om het bereik van 40-60% te bereiken
- De meeste batterij-indicatoren tonen 2-3 streepjes van de 5, of 40-60% op een percentage-display, als het doelbereik
Snelreferentie laadniveau:
|
Batterij-indicator
|
Geschatte lading
|
Geschiktheid voor opslag
|
|
5/5 streepjes (100%)
|
Volledig opgeladen
|
Te hoog
|
|
4/5 streepjes (80%)
|
Bijna vol
|
Nog steeds te hoog
|
|
3/5 streepjes (60%)
|
Gemiddeld
|
Ideaal
|
|
2/5 streepjes (40%)
|
Gemiddeld-laag
|
Ideaal
|
|
1/5 streepjes (20%)
|
Laag
|
Grenswaardig
|
|
0/5 streepjes (0%)
|
Leeg
|
Nooit hier bewaren
|
Temperatuurvereisten
Britse winters vormen een specifieke uitdaging: onverwarmde garages en schuren zakken regelmatig onder 0°C, wat ervoor zorgt dat lithiumcellen aanzienlijk sneller degraderen dan bij kamertemperatuur.
Richtlijnen voor opslagtemperatuur:
-
Optimaal bereik: 10°C tot 20°C (een logeerkamer, kledingkast of verwarmde bijkeuken)
-
Acceptabel bereik: 5°C tot 25°C
-
Vermijden: Onder 5°C (versnelt capaciteitsverlies) en boven 30°C (versnelt chemische afbraak)
-
Nooit: Opslaan onder 0°C — dit veroorzaakt permanente celschade
Praktische oplossing voor Britse fietsers: Haal de batterij van de fiets en bewaar deze binnenshuis, zelfs als de fiets in de garage blijft. Deze ene stap — kosteloos — behoudt meer batterijcapaciteit dan welke andere actie dan ook.
Batterijonderhoud tijdens opslag
Lithiumcellen ontladen langzaam vanzelf, zelfs wanneer ze zijn losgekoppeld. Gedurende een opslagperiode van 3-6 maanden kan een volledig onbeheerde batterij onder veilige spanningsniveaus zakken.
Aanbevolen controleschema:
- Controleer het laadniveau van de batterij elke 6-8 weken tijdens opslag
- Als de lading onder de 30% is gedaald, laad dan kort bij tot 40-50%
- Laat nooit een lithiumbatterij langer dan 2-3 maanden ontladen liggen—cellen die extreem lage spanningen bereiken, lijden permanent capaciteitsverlies
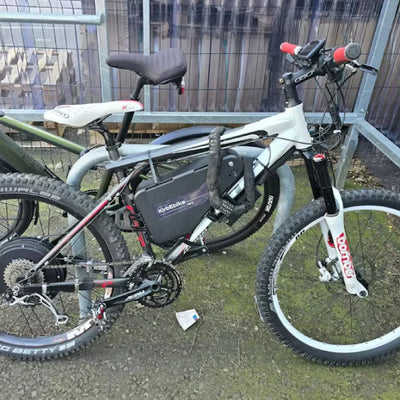
Deel 3: Opslag van de fiets en resterende onderdelen
Nu de batterij veilig binnenshuis is opgeborgen, richt de aandacht zich op de fiets zelf en de elektrische componenten die eraan vastzitten.
Ideale opslagomgevingen
Niet alle fietsers hebben dezelfde opslagmogelijkheden. Deze gerangschikte gids helpt het beste te maken van de beschikbare ruimte:
Specifieke zorg voor componenten tijdens opslag
Motorwielnaafmotor: De borstelloze naafmotoren die worden gebruikt in het assortiment van Kirbebike – van de 250W voorwielsystemen tot de krachtige 2000W+ achternaafmotoren – zijn afgedichte eenheden die minimale speciale aandacht vereisen voor opslag. De belangrijkste acties zijn ervoor zorgen dat de motorbehuizing droog is vóór opslag en dat het uitgangspunt van de motorkabel is afgedicht tegen vocht. Als u opslaat in een vochtige omgeving, breng dan een dunne laag corrosiewerende spray aan op de buitenkant van de motorbehuizing.
Middenmotor (Tongsheng TSDZ8): De Tongsheng TSDZ8 middenmotor kit profiteert van het verwijderen van de aandrijfketting tijdens langdurige opslag om spanning van het kettingblad en de achtercassette te verlichten. Reinig en smeer het montagegebied van het onderste bracket lichtjes in vóór opslag, en zorg ervoor dat de bouten van de motorbehuizing correct zijn aangedraaid voordat u de fiets opbergt.
Deel 4: Opnieuw inbedrijfstelling vóór het seizoen
Het einde van de opslag vereist evenveel aandacht als het begin. Door de kit na maanden van stilstand correct weer in gebruik te nemen, voorkomt u storingen tijdens de eerste rit.
Stap-voor-stap inbedrijfstelling in het voorjaar
Twee weken voordat je gaat fietsen:
-
Haal de batterij uit de binnenopslag. Laat deze 2-3 uur op kamertemperatuur komen voordat u deze oplaadt — laad nooit een koude batterij rechtstreeks op vanuit een koude omgeving.
-
Laad de batterij volledig op met de originele oplader. Let op de tijd die nodig is om volledig op te laden — een aanzienlijk langere tijd dan normaal duidt op capaciteitsverlies tijdens opslag.
-
Inspecteer de batterijcontacten op zowel de batterij als de montagerails van de fiets. Reinig eventuele corrosie met een droge doek en breng verse diëlektrische vet aan.
Deel 5: Opslagduur en seizoensgebonden overwegingen
Verschillende opslagduren vereisen verschillende niveaus van voorbereiding.
|
Opslagduur
|
Batterijvoorbereiding
|
Elektrische voorbereiding
|
Mechanische voorbereiding
|
|
2-4 weken
|
50-60% opgeladen, koele locatie
|
Afdekken connectoren
|
Banden oppompen
|
|
1-3 maanden
|
50-60% opgeladen, binnen
|
Diëlektrisch vet op alle connectoren
|
Volledige aandrijving smeren
|
|
3-6 maanden
|
50-60% opgeladen, maandelijkse controles
|
Alle connectoren loskoppelen en afdekken
|
Volledig reinigen, smeren en roestpreventie
|
|
6+ maanden
|
50-60% opgeladen, twee-maandelijkse controles
|
Display verwijderen, alle poorten afdichten
|
Volledige service voor opslag en voor teruggave
|
Kans buiten het seizoen: Upgrades en onderhoudsplanning
Het buiten-seizoen biedt het ideale moment voor componentupgrades en proactief onderhoud dat moeilijk te plannen is tijdens reguliere rijperioden.
Overweeg tijdens winterstalling:
-
Upgrade batterijcapaciteit — Als de actieradius merkbaar is afgenomen tijdens het rijseizoen, is het buiten-seizoen de perfecte timing om een vervangende batterij met hogere capaciteit te vinden en te testen batterij voordat de lente aanbreekt
-
Controle spaakspanning — Wielen met een naafmotor en hogere spaakbelastingen profiteren van een volledige spanningscontrole en eventueel benodigd richten tijdens de stalling, wanneer het wiel kan worden verwijderd en bewerkt zonder de rijplannen te onderbreken
-
Lageronderhoud — Lagers van naafmotoren bij kits met veel kilometers kunnen het beste proactief in de winter worden onderhouden, in plaats van reactief midden in het voorjaarsseizoen
-
Remupgrade — Als je plannen voor de uitbreiding van je rijuitrusting krachtigere opties omvatten, is de installatie en het inrijden van nieuwe remmen eenvoudiger en veiliger om vóór het seizoen te doen dan tijdens
-
Upgrade controller of display — Systeemupgrades kunnen het beste zonder tijdsdruk worden aangepakt; de winter biedt de rustige omgeving die nodig is om wijzigingen aan te brengen, grondig te testen en eventuele problemen op te lossen voordat je het systeem gebruikt voor het dagelijkse woon-werkverkeer
Conclusie
Juiste opslag buiten het seizoen is geen optionele extra voor eigenaren van e-bike ombouwsets – het is een van de meest impactvolle onderhoudsbeslissingen die je gedurende het jaar neemt. De combinatie van de juiste opslaadniveau van de batterij, temperatuurgecontroleerde opslag van de batterij binnenshuis, grondige reiniging voordat de fiets wordt opgeborgen.
Die levensduur ontstaat niet toevallig - het komt van rijders die hun uitrusting tussen ritten door met dezelfde zorg behandelen als tijdens ritten. Of je nu momenteel een kit door de eerste winter beschermt of upgrades plant voor volgend seizoen, verken het volledige assortiment van Kirbebike ombouwsets om alles te vinden wat je nodig hebt om het volgende seizoen sterker dan ooit te beginnen.
Veelgestelde vragen
Op welk laadniveau moet ik mijn e-bike ombouwset batterij opslaan?
Sla lithiumbatterijen op met 40-60% lading – meestal 2-3 streepjes op een indicator met 5 streepjes. Dit laadniveau minimaliseert de elektrochemische belasting van de cellen. Sla nooit volledig opgeladen (100%) of volledig leeg (0%) op, aangezien beide extremen het permanente capaciteitsverlies tijdens de opslagperiode versnellen.
Kan ik mijn e-bike ombouwset in een onverwarmde garage opslaan gedurende de winter?
De fiets zelf kan in een schone, droge garage blijven, maar de batterij moet naar binnen. Lithiumbatterijen die onder 5°C worden opgeslagen, ervaren versnelde capaciteitsdegradatie, en opslag onder 0°C veroorzaakt permanente celschade. B
Hoe vaak moet ik een opgeslagen e-bike batterij controleren?
Controleer het laadniveau elke 6-8 weken tijdens opslag. Als het onder 30% is gezakt, geef dan een korte oplaadbeurt tot 40-50%. Lithiumcellen gedurende langere periodes – met name meer dan 2-3 maanden – op zeer lage spanningen laten staan, veroorzaakt onomkeerbare capaciteitsvermindering.
Moet ik het motorwiel van mijn fiets verwijderen voor opslag?
Het verwijderen van het motorwiel is niet nodig voor standaard opslagperiodes. Laat het wiel geïnstalleerd, zorg ervoor dat de motorbehuizing schoon en droog is, en stal de fiets rechtop. Verwijdering is alleen nuttig als je lagers moet onderhouden of opslaat in een zeer beperkte ruimte.
Hebben middenmotor ombouwsets andere opslagverzorging nodig dan naafmotor kits?
De regels voor batterijopslag zijn identiek voor beide. Middenmotorsystemen zoals de Tongsheng TSDZ8 profiteren van het verwijderen van de ketting om de spanning van het kettingblad en de cassette te verminderen tijdens lange opslagperiodes, en van het controleren of de bevestigingsbouten van de trapas correct zijn aangedraaid voordat de fiets wordt opgeslagen.
: invalid url input)
usmile
Liquid error (snippets/blog-best-product line 36): product form must be given a product
Liquid error (snippets/blog-best-product line 59): product form must be given a product