Een naafmotor drijft het wiel voorwaarts en duwt met gelijke kracht terug op zijn eigen as. Die reactiekoppel is wat uitvaleinden spreidt, assen doet rondtollen en motorkabels doorsnijdt bij krachtige constructies — en het is de reden waarom torsiearmen bestaan. Of u één arm, twee, of een aangepaste plaat nodig heeft, wordt bepaald door gemeten koppel, asaansluiting, sterkte van het uitvaleinde en regeneratief remmen — nooit door het wattage op de doos. Deze gids behandelt hoe torsiearmen werken, wanneer één voldoende is, wanneer twee nodig zijn, en hoe ze veilig te monteren op 1000W–4000W naafmotoren.

Een torsiearm verplaatst de reactiekracht van de as weg van de kleine uitvaleindsleuf naar een groter, sterker deel van het frame. Wattage alleen kan u niet vertellen hoeveel u nodig heeft. Een 1000W achtermotor op dikke stalen uitvaleinden zonder regeneratie, een strakke as-plaat pasvorm en een goedgekeurde enkelarmige opstelling kan prima zijn met één ontworpen arm. Een 2000W–4000W constructie, een voornaaf, aluminium uitvaleinden, vrachtladingen of regeneratief remmen zouden een technische beoordeling van die specifieke motor, controller, frame en remopstelling moeten triggeren. Twee dunne, losse armen zijn niet automatisch veiliger dan één correct gemonteerde zware arm — en geen koppelwaarde, volgorde van ringen of montagerichting mag ooit van de ene motor naar de andere worden gekopieerd.
Wat doet een Ebike Torque Arm?
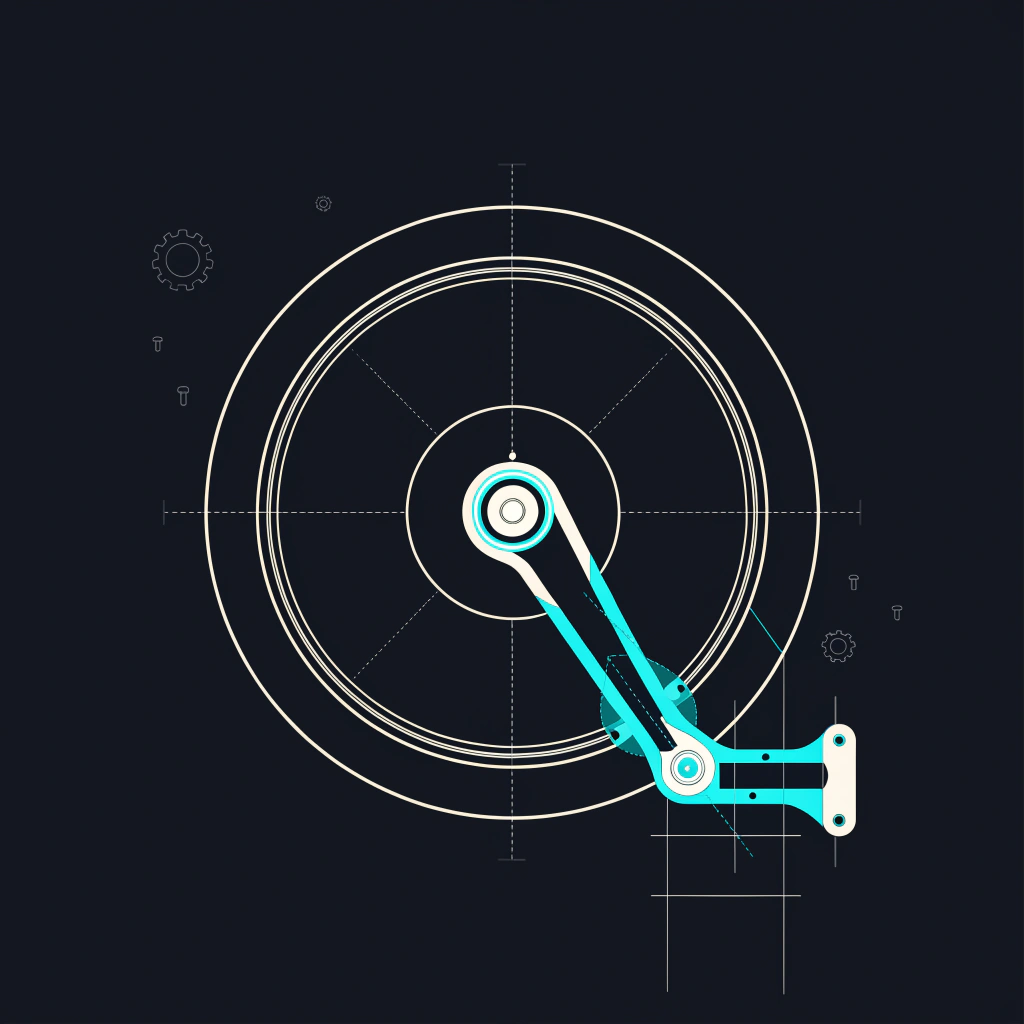
Een torsiearm is een anti-rotatiecomponent die over de platte zijde van de motoras past en aan het frame of de voorvork wordt verankerd. Het heeft twee functies: het voorkomt dat de as in de dropout roteert, en het draagt de reactiekoppel over naar een sterker gedeelte van het frame. Het is geen wielbevestigingsmechanisme — vertrouw er niet op om het wiel vast te houden als de klemkracht van de asmoer verloren gaat.
De fysica is eenvoudig. De motor draait het wiel vooruit, dus de as duwt met gelijke kracht terug. De asvlakken drukken tegen de zijkanten van de dropout, en herhaalde belasting kan deze spreiden, scheuren of vervormen. Een torsiearm vergroot de afstand tussen de as en het punt waar die kracht wordt weerstaan. De getallen zijn groter dan de meeste rijders verwachten: een 12 mm as die 40 N·m produceert, oefent een spreidende kracht van iets minder dan 1.000 lb uit op elke dropout — en dat is precies waarom het motorvermogen alleen de mechanische belasting niet beschrijft.
Koppelring vs torsiearm vs koppelplaat
Een koppelring is een klein lipje dat in de dropout grijpt — beperkte lokale ondersteuning, sterk afhankelijk van correcte plaatsing, en geen vervanging voor een ontworpen arm bij een krachtige constructie. Een torsiearm verplaatst het reactiepunt weg van de as en verankert via een klem, oog, vastgeschroefde plaat of aangepaste montage. Een koppelplaat is meestal een grotere of aangepaste plaat die rond het dropout-gebied wordt bevestigd, geschikt voor hoog gemeten koppel, ongebruikelijke geometrie, regeneratie, of dropout-oppervlakken die versteviging nodig hebben. Behandel geen van deze namen als bewijs van sterkte — constructie en pasvorm zijn belangrijker.
Waarom Wattage Alleen Niet Kan Bepalen Hoeveel Torque Arms Nodig Zijn
Veel handleidingen beweren dat één arm altijd voldoende is onder een bepaald wattage en dat twee verplicht zijn erboven. Dat is een oversimplificatie, en het kan in beide richtingen onjuist zijn.
Elektrisch ingangsvermogen versus mechanisch askoppel
Motor-ingangsvermogen is spanning × stroom. Mechanisch vermogen is koppel × hoeksnelheid. Een motor met lage snelheid kan dus een aanzienlijk askoppel produceren bij een bescheiden wattage, terwijl een motor met hoge snelheid een hoger wattagecijfer kan laten zien zonder proportioneel hoger startkoppel.
Nominaal vermogen versus piekvermogen
Een kit die als 1000W op de markt wordt gebracht, kan bij acceleratie veel meer verbruiken, en een 3000W motor met een lagere-stroomregelaar belast de as mogelijk niet zo hard als een ander 3000W systeem. Beoordeel deze afzonderlijk: nominale classificatie, batterijstroomlimiet, regelaarfasestroom, piek elektrisch ingangsvermogen, gemeten motorkoppel en regeneratiekoppel.
Een gerelateerde mythe: asreactiekoppel komt van de motor zelf, dus de wieldiameter verandert de kracht aan de band en de resulterende acceleratie — maar een groter of kleiner wiel maakt een zwak uitvaleinde nooit veilig.
- Stroombegrenzing batterij en fasestroom van de controller
- Gepubliceerd of gemeten piek askoppel (N·m)
- Asdiameter en afstand over de vlakken
- Of regeneratief remmen is ingeschakeld
- De door de ingenieur goedgekeurde armopstelling voor die exacte variant
Wanneer is één torsiearm voldoende?
Eén hoogwaardige torsiearm kan voldoende zijn wanneer de complete installatie technisch is beoordeeld en aan alle volgende voorwaarden is voldaan:
- Achternaafmotor in plaats van een voormotor
- Geen regeneratief remmen
- Sterke, onbeschadigde uitvaleinden met volledige asaansluiting aan beide zijden
- Asplaat past met minimale speling op de vlakken
- Arm is dik genoeg en goedgekeurd voor de gemeten belasting
- Arm verankert aan een sterke frameplaats, en asmoeren hebben voldoende schroefdraadaansluiting
- Motorkabel is beschermd en bevestigingsmiddelen zijn gemakkelijk te inspecteren
- De fabrikant staat uitdrukkelijk een enkelarmige opstelling toe
Dit is waarom het onderdeel belangrijker is dan het aantal. Grin merkt op dat één van hun dikke armen vaak voldoende is, terwijl dunnere armen van derden mogelijk moeten worden verdubbeld — evalueer het daadwerkelijke component, niet alleen het wattage van de motor.
Achtermotor versus voormotor
Achterste uitvaleinden zijn doorgaans dikker en beter ondersteund dan voorvorken. Desondanks kan een achtermotor nog steeds ondiepe of beschadigde uitvaleinden spreiden, en een storing aan het voorwiel veroorzaakt onmiddellijk verlies van sturing en wielbevestiging. Een voornaaf vereist een vorkspecifieke beoordeling, ongeacht het wattage.
Staal versus aluminium uitvaleinden
Staal vervormt meestal voordat het breekt, maar vereist nog steeds een correcte as- en ringpasvorm. Aluminium is gevoeliger voor lokale spanning en slechte ringzitting, en kan barsten in plaats van zichtbaar te spreiden — het verdient een conservatievere beoordeling. Aluminium en carbon frames mogen nooit koud gezet of opnieuw uitgelijnd worden om een motor te laten passen. Staal maakt een torsiearm niet standaard optioneel.
Wanneer zijn twee torsiearmen nodig?
Twee armen kunnen de belasting delen en redundantie toevoegen – maar alleen als beide correct zijn geïnstalleerd. Overweeg dubbele armen wanneer de constructie een van de volgende elementen omvat:
- Hoog gemeten startkoppel, of een 2000W–4000W systeem
- Hoge stroomfase van de controller
- Aluminium uitvaleinden, of ondiepe uitvalbevestiging
- Vrachtgebruik, zware totale belasting, of herhaalde starts op steile hellingen
- Intensief off-road gebruik, of regeneratief remmen
- Elke voorgaande beweging van het uitvaleinde
- Dunne torsiearmen van derden, of geen geschikte ankerpunten voor één arm
- Een fabrikantspecificatie die dubbele armbevestiging vereist
Eén zware arm versus twee dunne armen
| Factor | Eén ontworpen zware arm | Twee dunne universele armen |
|---|---|---|
| As passing | Kan strak worden gecontroleerd | Vaak variabel |
| Belastingspad | Gedefinieerd door één bevestiging | Afhankelijk van twee werkende bevestigingen |
| Redundantie | Lager | Hoger — alleen als beide daadwerkelijk werken |
| Installatieruimte | Eenvoudiger | Moeilijker |
| Installatie aan kabelzijde | Meestal vermeden | Kan interfereren met de kabel |
| Geschiktheid | Afhankelijk van de geverifieerde classificatie | Niet automatisch veiliger |
Waarom de kabelzijde lastig kan zijn

De motorkabel komt vaak via het aseinde naar buiten. Een sleuf in de torsiearm mag deze niet snijden of samendrukken, en het verwijderen van connectoren om een arm over de kabel te plaatsen kan de garantie of de integriteit van de connector beïnvloeden. Hardware aan de kabelzijde moet ook voldoende schroefdraadaansluiting van de asmoer overlaten. Knip nooit een motorkabel tijdens een normale installatie.
Dubbele armen voor regeneratief remmen
Acceleratie oefent reactiekoppel in één richting uit; regeneratie keert dit om. Die wisselende belasting veroorzaakt heen-en-weer beweging van de as, slijtage van de sleuf, losraken van bevestigingsmiddelen, wrijving van de uitval, kabelbeweging en bezinking van ringen. Grin's advies is om de speling te minimaliseren en voorspanning in tegengestelde richting of een speciaal klemmend ontwerp te gebruiken voor omkeerkoppel.
Hoe kies je een torsiearm die past bij de motoras?
Meet de asdiameter en de vlakken
Noteer de maximale asdiameter, de afstand over de vlakken, de beschikbare lengte van de vlakken, de schroefdraaddiameter en -lengte, de positie van de kabeluitgang, en de afmetingen van de schouder en de ring. "12 mm" of "14 mm" beschrijft meestal het ronde gedeelte — de afstand over de vlakken kan verschillen, en het inzetstuk moet overeenkomen met de werkelijke vlakken.
Controleer de pasvorm van de asplaat
Een correcte pasvorm zorgt voor volledig contact met de vlakken, minimale rotatiespeling, geen puntbelasting, geen hameren op de plaat, en geen materiaalverwijdering zonder schriftelijke goedkeuring. De huidige ontwerpen van Grin gebruiken geharde spiebaan-inzetstukken en publiceren printbare 1:1-profielen, zodat u de pasvorm kunt testen voordat u koopt.
Materiaal en dikte
Evalueer materiaalkwaliteit, warmtebehandeling, dikte van de assleuf, weerstand tegen vervorming, corrosiebescherming, bevestigingsmiddelkwaliteit en eventuele testgegevens van de fabrikant. Vermijd ongegronde regels zoals "elke arm moet 6 mm zijn" of "aluminium armen zijn altijd onveilig" — kwaliteit en geometrie moeten samen worden overwogen.
Eendelig, meerdelig en klemmend ontwerp
| Ontwerp | Sterke punten | Hoofdcontrole |
|---|---|---|
| Eéndelige plaat | Minder geschroefde verbindingen; kan framespecifiek zijn | Beperkte verstelbaarheid |
| Meerdere verstelbare armen | Past op meer framegeometrieën | Meer verbindingen die veilig moeten blijven; oriëntatie is van belang |
| Klemblok voor as | Vermindert asbeweging in beide richtingen; geschikt voor omkeerbaar koppel | Moet exact overeenkomen met asafmetingen |
Een veilig bevestigingspunt kiezen voor het frame
De as-inzet is slechts de helft van het systeem — de framebevestiging moet de belasting ook dragen. Geen enkele locatie is universeel het sterkst; het hangt af van het frame.
| Bevestigingsgebied | Potentieel voordeel | Hoofdcontrole |
|---|---|---|
| Achtervork | Vaak dichter bij de as | Buissvorm en componentenruimte |
| Zitbuis | Kan een langere arm bieden | Buisswand en klempositie |
| Dropout oogje | Nette geschroefde montage | Structurele capaciteit van het oogje |
| Aangepaste dropout plaat | Directe belastingsweg | Engineering en fabricagekwaliteit |
Spatbord- en bagagedragerogen
Een oogje kan alleen zijn ontworpen voor spatborden of lichte bagagedragers. Voordat u het als anker gebruikt, controleer de schroefdraadmaat, het inzetmateriaal, de las- of soldeerconstructie, de dikte van het omringende frame, de belastingsrichting en de goedkeuring van de fabrikant. Een nette uitstraling bewijst geen structurele capaciteit.
Slangklembevestiging
Een klemontwerp kan geschikt zijn voor sommige frames, maar het moet deel uitmaken van het door de fabrikant goedgekeurde ontwerp, op een geschikt framegedeelte zitten, remslangen en kabels vermijden, vermijden dat dunne buizen worden verbrijzeld en toegankelijk blijven voor inspectie. Voeg geen rubber toe onder een klem, tenzij de fabrikant dit toestaat — een zachte laag kan de verf beschermen, maar kan beweging introduceren.
Carbon frames
Klem een torsiearm nooit rechtstreeks aan een ongesteunde carbon buis of dropout. Een installatie op een carbon frame vereist goedkeuring van de motor- en framefabrikant, structurele metalen inzetstukken, een ontworpen koppeloverdrachtssysteem en professionele installatie.
Correcte montageprincipes voor torsiearmen

Principe 1 — Monteer de motoras volledig
Controleer of de as de beoogde uitvaldikte bereikt, beide zijden gelijkmatig zitten, de kabel niet klem zit, anti-rotatieringen ingrijpen, het wiel gecentreerd is en de rotor en versnellingen het frame vrij laten.
Principe 2 — Bevestig de arm tegen de vlakken van de as
De torsiearm moet mechanisch ingrijpen in de vlakken. Wrijving rond een rond asoppervlak is niet voldoende.
Principe 3 — Plaats de arm om reactiekoppel te weerstaan
De bevestiging moet het reactiekoppel naar het frame overbrengen zonder de as uit een open uitvaleinde te trekken, langs een buis te glijden, door een verstelbare verbinding te draaien, een zwak accessoirelipje te belasten of rond een scherpe hoek te buigen. Er is geen universele "altijd naar voren richten"-regel — de oriëntatie verandert met voor versus achter, links versus rechts, uitvalrichting, armontwerp en regeneratie. Grin documenteert dat het omkeren van een van hun eerdere ontwerpen de as kon aanmoedigen om de uitval te verlaten — wat precies de reden is waarom het productspecifieke diagram de oriëntatie moet controleren.
Principe 4 — Verwijder speling vóór definitieve aandraaiing
Vrije beweging laat de as momentum opbouwen en de arm raken voordat de belasting wordt overgedragen. Controleer de as-naar-inzetbeweging, de beweging van verstelbare verbindingen, de speling van de oogbout, het slippen van de klem en de slijtage van de uitval.
Principe 5 — Gebruik de goedgekeurde aanhaalvolgorde
Plaats het wiel en de ashardware, positioneer de anti-rotatiecomponenten, monteer de arm zonder definitieve aandraaiing, lijn wiel/rotor/versnellingen uit, draai de asmoeren aan tot de geverifieerde specificatie, bevestig de framebevestiging, en controleer vervolgens de uitlijning en de kabelgeleiding opnieuw — volgens de goedgekeurde volgorde voor uw motorvariant, niet een generieke video.
Regeneratief remmen verandert de belastingen van de torsiearm
Acceleratie oefent reactiekoppel in één richting uit; regeneratie keert dit om. Die afwisselende belasting veroorzaakt asbeweging, sleufslijtage, losraken van bevestigingsmiddelen, wrijving van de uitval, kabelbeweging en bezinking van ringen.
| Functie | Standaard glijdende arm | Klem- / regeneratiearm |
|---|---|---|
| Hoofdbelastingsrichting | Voornamelijk één richting | Beide richtingen |
| Afhankelijkheid van voorspanning | Hoger | Lager indien correct geklemd |
| Astolerantie | Moet zorgvuldig worden gecontroleerd | Klemmen kan beweging verminderen |
| Geschiktheid voor regeneratie | Productafhankelijk | Ontworpen voor omkeerbare belasting |
Grin's V7 gebruikt een klemmende asinterface die specifiek bedoeld is voor regeneratieve remtoepassingen, terwijl de andere modellen verschillende verankeringsarrangementen gebruiken.
Controllerconfiguratie is van belang
Controllerinstellingen wijzigen fasestroom, acceleratieramp, regeneratieve remkracht, omgekeerd koppel en piekvlakbelasting. KirbEbike's slimme controllers en displays zijn afgestemd op het vermogen. Controllerstroomlimieten variëren per kit - controleer het cijfer op de productpagina voor uw exacte variant en bevestig of het een batterij- of fasestroomsterkte is.
Commerciële koppelarmopties om eerlijk te vergelijken
Deze opties worden beoordeeld op identieke gebieden – asmaat, montagemethode, geschiktheid voor regeneratie, materiaal en belangrijkste beperking. Ze zijn niet gerangschikt en geen enkele is een universele winnaar. Bevestig de huidige specificaties en voorraad op elke productpagina voordat u bestelt.
| Optie | Asmaten | Montage | Regen | Materiaal | Belangrijkste beperking |
|---|---|---|---|---|---|
| Ebike Solution M14 arm (VK) | M14 (14×10mm vlakken) | Slangklem aan buis/vork | Niet gespecificeerd | 5 mm roestvrij staal | Beperkte gepubliceerde testgegevens; controleer pasvorm |
| Grin V5 | 12 / 14 / 16 mm | Bout aan spatbord/drager oogje | Niet regen-specifiek | 3 mm roestvrij staal, gehard 17-4 inzetstuk | Afhankelijk van de locatie en sterkte van het oogje |
| Grin V6 | 12 / 14 / 16 mm | Frameklem + twee slangklemmen | Niet regen-specifiek | 3 mm roestvrij staal, gehard 17-4 inzetstuk | Vereist een goedgekeurde buis/klemconstructie |
| Grin V7 | Aparte 12 mm / 14 mm | Frameklem + slangklemmen | Ontworpen voor regeneratie | Gehard 17-4, grade 12.9 bouten | Afmetingen en ruimte van de as moeten exact overeenkomen |
| KirbEbike kit hardware | Per kitvariant (135–142 mm) | Geleverd met krachtige kits | Bevestigen per variant | Bevestigen per variant | Identificeer het exacte onderdeel voor uw kit |
| Op maat gemaakte plaat | Gemaakt op de gemeten as | Frame-specifieke bevestigingen | Ontwerpafhankelijk | Gespecificeerd door de ingenieur | Vereist technische beoordeling en nauwkeurige fabricage |
KirbEbike kitspecifieke hardware
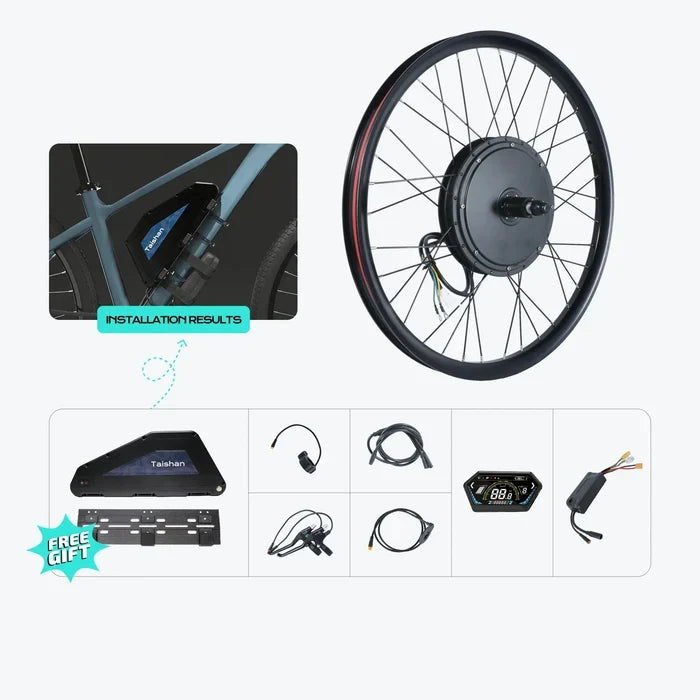
KirbEbike levert installatieaccessoires bij zijn motorwielen en ombouwsets, en zijn eigen richtlijnen wijzen op overgeslagen koppelarmen en verkeerde dropout-afmetingen als belangrijke risico's. Identificeer de exacte arm of plaat die wordt geleverd bij uw specifieke 1000W–4000W product — materiaal, dikte, ascompatibiliteit, vereiste voor één arm/twee armen, installatietekening en vervangingsroute. De krachtige kits die ermee worden geleverd, omvatten de 52V 2000W MTX, 60V 2500–3000W MTX en 72V 4000W kits.
Op maat gemaakte koppelplaat
Ontworpen rond het exacte frame en de as, gebruikmakend van sterke bestaande bevestigingspunten, een groot contactoppervlak en in staat om zeer hoog gemeten koppel te ondersteunen. Beperkingen: vereist nauwkeurige materiaalkeuze, technische beoordeling en precieze fabricage, mag geen scherpe framebelastingen introduceren en kan niet op uiterlijk worden beoordeeld.
KirbEbike Krachtige Achternaafkits
Koppelarmhardware wordt geleverd bij de krachtige kits – afgestemd op de motor, met de aspecificaties en installatietekening voor uw exacte variant.
Veiligheidsinspectie na installatie
Voordat u motorkracht toepast
Controleer of de as volledig is geplaatst, de arm niet met de hand kan draaien, het montagepunt structureel geschikt is, asmoeren de juiste aanhaalmomenten hebben, de rotor en aandrijflijn vrij lopen, de kabel beschermd is en bevestigingsmiddelen zijn gemarkeerd zodat beweging later zichtbaar wordt.
Eerste test bij lage belasting
Alleen na een goedgekeurde installatie: ondersteun het aangedreven wiel veilig, controleer de rotatie bij laag vermogen, bevestig dat er geen kabelbeweging is, luister naar contact en test de remuitschakelaars. De veel herhaalde test "houd de rem vast en geef gas" past opzettelijk een hoge belasting toe terwijl u stilstaat – dit is geen veilige universele controle op een installatie die u nog aan het controleren bent.
Eerste rit en doorlopende inspectie
Controleer na de eerste ritten op veranderde markeringen van de asmoer, nieuw metaal rond de dropouts, scheurtjes in de verf, beweging van de arm of klem, aanlopen van de rotor, scheefstand van het wiel en draaiing van de kabel. Stel doorlopende intervallen in op basis van vermogensniveau, off-road gebruik, bagagelading, regeneratie, framemateriaal en type bevestigingsmiddel – niet op basis van een algemeen kilometercijfer.
Waarschuwingssignalen van koppelarm- of dropoutfalen
Wat niet te doen nadat beweging is gevonden
Draai de bouten niet opnieuw aan en blijf niet rijden, voeg geen ringen toe zonder diagnose, vul beschadigde dropouts niet met lijm, monteer geen tweede generieke arm over de schade, vijl de dropout niet verder, en overschrijd het gespecificeerde aanhaalmoment van de asmoer niet. Laat het inspecteren door de kittoeleverancier, een gekwalificeerde monteur of een ingenieur die bekend is met naafmotorbelastingen.
Veelvoorkomende fouten bij de installatie van een koppelarm
De meeste storingen zijn terug te voeren op een korte lijst van vermijdbare fouten:
- Alleen selecteren op wattage — gemeten koppel, frame en controllerinstellingen bepalen de vereiste.
- Een losse asplaat — beweging zorgt voor impactbelasting voordat de arm iets tegenhoudt.
- Verkeerde montagerichting — sommige ontwerpen moedigen asejectie aan bij omgekeerde beweging.
- Een zwak spatbord oogje vertrouwen — een schone uitstraling bewijst geen structurele capaciteit.
- Twee koppelarmen van lage kwaliteit als veilig beschouwen — gelijke lastverdeling is niet gegarandeerd.
- Te veel onderdelen blokkeren de asmoer — onvoldoende schroefdraad grijpen ondermijnt het vasthouden van het wiel.
- De motorkabel beknellen — schade kan fasekabelkortsluiting of systeemfalen veroorzaken.
- Frameklemmen te strak aandraaien — verpletterde buizen en spanningsconcentraties leiden tot framefouten.
- Een koppelwaarde van een andere motor kopiëren — verschillende schroefdraden en ringen creëren verschillende voorspanning.
- Regelaarstroom verhogen zonder de mechanica opnieuw te controleren — afstemming verandert de asbelasting, zelfs als de motor niet is veranderd.
Conclusie
Een koppelarm verhoogt de acceleratie of het motorkoppel niet; het regelt het gelijke en tegengestelde reactiekoppel dat op de as werkt. De juiste configuratie hangt af van het werkelijke koppel, de controllerstroom, de afmetingen van de as, de sterkte van de dropout, het framemateriaal, de motorpositie, regeneratie en het eigen ontwerp van de arm.
Eén correct ontworpen arm kan voldoende zijn bij sommige achteraan geplaatste motoren. Twee armen of een op maat gemaakte plaat kunnen nodig zijn voor hogere belastingen, omkerend koppel of zwakkere dropouts. Twee generieke armen zijn niet automatisch veiliger dan één geteste, zware arm, en geen enkele koppelwaarde, volgorde van ringen of montagerichting mag worden overgenomen van niet-gerelateerde motoren. Bij twijfel, stuur duidelijke foto's en metingen naar uw kitleverancier voordat u motorkracht toepast – en controleer eerst uw frame met de wiel- en dropout-pascontrole.
Veelgestelde vragen
Heb je een koppelarm nodig voor een 1000W e-bike?
Hoe stel je een e-bike koppelarm af?
Heeft een 2000W naafmotor twee koppelarmen nodig?
Wat is het koppel van een 3000W naafmotor?
Welke koppelarm moet worden gebruikt voor een 4000W naafmotor?
Zijn twee koppelarmen altijd beter dan één?
Vereist regeneratief remmen een andere koppelarm?
Bronnen
- Grin Technologies — Koppelarmen: ontwerpen, testen en installatiehandleiding. ebikes.ca
- Grin Technologies — De nutteloosheid van motorvermogens (vermogen versus koppel). ebikes.ca
- Grin Technologies — Fietscompatibiliteit (dropouts en naafmotorpasvorm). ebikes.ca
- Park Tool — Wiel verwijderen en installeren. parktool.com
- Sheldon Brown — Fietsframe en naafafstand (grenzen voor koudzetten). sheldonbrown.com
- Cycling UK — EAPC-voorschriften uitgelegd. cyclinguk.org
- Britse regering — Regels voor elektrische fietsen (EAPC). gov.uk/electric-bike-rules