Riding an e-bike conversion kit through the UK's notorious wet weather requires more than just waterproof clothing—your electrical components need protection too. From persistent drizzle to heavy downpours, moisture is the single biggest long-term threat to hub motors, controllers, batteries, and wiring connections.
The good news is that most quality conversion kits offer reasonable weather resistance from the factory, and with a few targeted improvements, you can confidently ride through virtually any UK weather conditions. This guide covers everything from understanding IP ratings to component-by-component weatherproofing techniques.
Understanding IP Ratings on E-Bike Components
![]()

Before modifying anything, understand what protection your existing components already offer. IP (Ingress Protection) ratings tell you exactly how waterproof each component is.
IP Rating Decoder
|
IP Rating
|
Dust Protection
|
Water Protection
|
Suitable For
|
|
IP54
|
Partial dust protection
|
Splashing from any direction
|
Light rain only
|
|
IP65
|
Fully dust tight
|
Low-pressure water jets
|
Normal rain riding
|
|
IP66
|
Fully dust tight
|
Powerful water jets
|
Heavy rain, puddles
|
|
IP67
|
Fully dust tight
|
Immersion up to 1 metre
|
Flood conditions
|
|
IP68
|
Fully dust tight
|
Continuous immersion
|
Extreme conditions
|
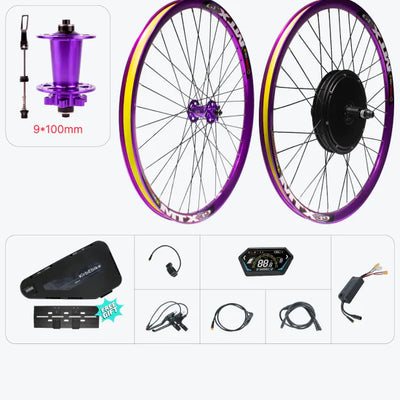
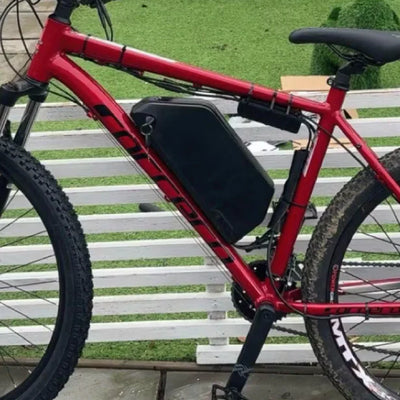
What to look for on Kirbebike components:
The Tongsheng TSDZ8 mid-drive motor system features an IP66 waterproof rating on the display unit—offering excellent protection for normal UK rain riding. Hub motor casings on Kirbebike kits are generally IP54-IP65 rated, providing adequate splash resistance for regular commuting in wet conditions.
Where to find your IP rating:
- Check product documentation or product page specifications
- Look for stamped codes on motor casings and controller housings
- Controller boxes often have ratings marked on their enclosure labels
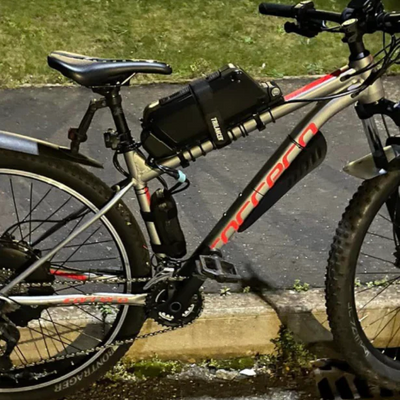
The Five Vulnerable Points on Any Conversion Kit
![]()

Rather than treating the entire bike as one waterproofing project, focus effort on the five areas where water causes the most damage.
Electrical connectors and joins — The single most vulnerable point. Water bridges connector pins, causes corrosion, and creates intermittent faults that are difficult to diagnose.
Controller housing — Controllers contain sensitive electronics. Even "waterproof" controllers develop seal failures over time, especially around cable entry points.
Battery mounting and contacts — The battery-to-bike connection point and charge port are constant water entry risks.
Display unit — Handlebar-mounted displays face direct rain impact and road spray from below.
Motor cable exit point — Where the motor cable exits the axle is a flexing, stress point that develops micro-cracks in insulation over time, allowing water ingress.
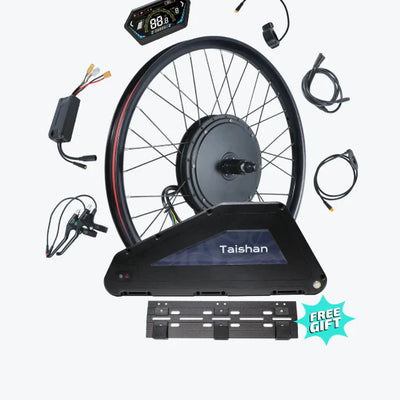
Component-by-Component Waterproofing Guide
![]()

Protecting Electrical Connectors
Connectors are responsible for the majority of water-related electrical failures. The standard approach uses three layers of protection.
Step-by-step connector protection:
-
Clean first — Use electrical contact cleaner spray to remove existing oxidation and moisture from all connector pins. Allow to dry completely (30 minutes minimum).
-
Apply dielectric grease — This non-conductive, waterproof grease fills air gaps within connectors, displaces moisture, and prevents future corrosion. Apply a small amount to both male and female connector halves before joining.
-
Heat shrink over joins — For any non-separating wire joins (such as spliced wires), use adhesive-lined heat shrink tubing rather than standard heat shrink. The adhesive liner melts and forms a complete seal around wires when heated.
-
Self-amalgamating tape on exposed connectors — For connectors that must remain accessible for occasional disconnection, wrap with self-amalgamating (self-fusing) silicone tape. Unlike regular tape, this forms a waterproof rubber seal that remains separable.
Connector protection priority order:
- Battery main power connector (highest priority)
- Controller input/output connectors
- Motor hall sensor connectors
- PAS sensor connector
- Brake sensor connectors
- Throttle connector (if fitted)
- Display connector
Waterproofing Your Controller
Controllers vary significantly in their factory weatherproofing. Budget controllers often have basic plastic housings with limited sealing, while better units include proper gaskets and cable glands.
Assessing your controller's current protection:
Inspect cable entry points—these are almost always where water gets in even on "waterproof" rated controllers. If cables simply pass through holes in the housing, additional sealing is needed.
Controller improvement options:
Option A: Silicone sealant around cable entries Apply neutral-cure silicone sealant (not acid-cure acetoxy type, which corrodes copper) around all cable entry points on the controller housing. Allow to cure fully before riding in rain.
Option B: Waterproof controller bag/case Weatherproof controller bags are available specifically for e-bike conversion kits, typically made from neoprene or waterproof fabric. These slip over the controller and velcro closed, providing an additional physical barrier. Particularly useful for controllers mounted in exposed positions.
Battery Protection in Wet Conditions
Most downtube batteries used with Kirbebike conversion kit batteries have manufacturer-fitted waterproof seals, but these require maintenance and the charge port remains vulnerable.
Battery sealing checklist:
-
Inspect the battery case seal — Most batteries use a rubber gasket between the two halves of the casing. Check this is intact and not compressed flat (which reduces its sealing effectiveness). Replace if visibly damaged.
-
Charge port protection — The charging socket is typically the least-protected part of any battery. When not charging, keep the rubber dust cap firmly in place. If your battery lacks a dust cap, a short length of self-amalgamating tape over the port provides emergency protection.
-
Mounting rail contacts — Clean battery slide contacts regularly with a dry cloth. Moisture plus road grime on these contacts causes corrosion that first appears as intermittent battery connection issues. Apply a light smear of dielectric grease to contacts monthly in heavy rain season.
-
Battery bag option — For batteries not permanently integrated into the frame, neoprene battery covers provide additional protection. These slip over the battery and are particularly useful for rear-rack mounted batteries that receive direct spray from the rear wheel.
What NOT to do with batteries in wet conditions:
- Never charge a wet battery—allow to dry completely first
- Never submerge any battery, regardless of IP rating claims
- Never use a pressure washer near battery connections
- Never leave batteries with compromised seals in continuous rain
Protecting the Motor
Hub motors are fundamentally sealed units—the coils and magnets are enclosed within the motor casing. However, two specific areas require attention.
Hub motor axle seals:
The axle holes where the motor mounts to the dropouts are sealed by bearing grease and often rubber washers. In heavy rain, particularly when riding through puddles, water can work past these seals over time.
Annual bearing inspection is recommended—remove the motor and check for water contamination by observing whether bearing grease has turned milky-white or rust-coloured. Both indicate moisture ingress requiring regreasing.
Motor cable protection:
The cable exit point on hub motors—where the three thick phase wires and five thinner hall sensor wires exit the axle—is the motor's most vulnerable water entry point.
Protection method:
- Check factory sealant around cable exit (often a grey silicon compound)
- If cracked or missing, clean area thoroughly and apply fresh neutral-cure silicone
- Ensure the cable has a drip loop (cable routes downward before going back up to controller) so water runs off the cable rather than along it into the motor
- Re-check this seal annually, as vibration and flexing causes gradual deterioration
Mid-drive motor considerations:
The Tongsheng TSDZ8 mid-drive motor benefits from its position in the bottom bracket area. Being lower to the ground means more puddle splash exposure but the bottom bracket area is partially sheltered by the bike frame. The IP66 rating on the display unit handles the most exposed component, and the motor housing itself is well-sealed in factory form. Focus waterproofing effort on the cable connections and display rather than the motor casing itself.
Display and Controls
Handlebar-mounted displays face the harshest conditions—direct rain from above and spray thrown up from the front wheel below.
Display protection steps:
-
Verify IP rating — Quality TFT and LCD displays rated IP65 handle normal rain comfortably. If your display lacks this rating, consider a display cover.
-
Cable entry sealing — Where the display cable enters the display housing is typically the weakest point. Apply silicone sealant around this joint if the factory seal appears compromised.
-
Display covers — Clear plastic display covers (often sold as "phone mount weather covers") slip over handlebar displays providing an additional physical barrier. These don't reduce readability significantly in most lighting conditions.
-
Throttle waterproofing — Thumb throttles and twist throttles expose internal potentiometers to moisture. Apply a small amount of dielectric grease around the cable entry point and consider wrapping the cable-to-throttle join with self-amalgamating tape.
When to Seek Professional Help
Some water damage symptoms require professional attention rather than DIY remediation:
-
Intermittent power loss after wet rides that resolves when dry — suggests water in a connector or controller
-
Display showing error codes only in rain — connector corrosion causing signal faults
-
Motor making new noises after flooding — potential bearing water contamination
-
Battery refusing to charge after heavy rain — BMS water protection activation or connection corrosion
Contact support or a qualified e-bike technician if self-inspection doesn't identify the problem, as corrosion can spread rapidly if left unaddressed.
Conclusion
The most effective and economical protection comes from dielectric grease on all connectors, silicone sealing of cable entry points, and consistent post-ride drying habits—materials that cost less than the labour for a single repair. Whether you're running a 250W commuter setup or a high-power hub motor kit, the waterproofing principles remain identical.
For riders ready to invest in long-term reliability, choosing a quality conversion kit from Kirbebike with robust factory weatherproofing gives you the best starting point before applying these additional protections. A well-maintained, properly sealed conversion kit should handle years of UK all-weather riding without significant water-related failures.
Frequently Asked Questions
Can I ride my e-bike conversion kit in heavy rain?
Yes, most quality conversion kits handle normal rain riding comfortably. Hub motors are sealed units, and controllers with IP65+ ratings handle sustained rain exposure well. The key vulnerabilities are connectors and charging ports—keep these protected with dielectric grease and covers, and avoid deep water above hub level.
What is dielectric grease and why is it essential for waterproofing?
Dielectric grease is a non-conductive, water-resistant silicone compound applied to electrical connectors. It displaces moisture, fills air gaps where water could pool, and prevents corrosion on connector pins. A small tube costing a few pounds can prevent faults that would cost far more to repair.
Can I use a pressure washer to clean my e-bike conversion kit?
No. Pressure washers force water past seals that would otherwise resist normal rain. The high-pressure stream can penetrate controller housings, hub motor axle seals, and battery gaskets that handle splashing perfectly well. Use a low-pressure hose or damp cloth for cleaning instead.
My controller gets wet but seems to work fine. Do I still need to waterproof it?
Yes. Water damage is cumulative—moisture causes gradual corrosion that eventually causes failures, often at inconvenient times. A controller that "works fine" after getting wet may have hairline moisture deposits forming on PCB traces that fail weeks later. Prevention is far cheaper than replacement.
How do I know if water has already damaged my controller or battery?
Look for green or white powdery deposits on connector pins (copper corrosion), milky or discoloured bearing grease in the motor (water contamination), or rust-coloured residue inside controller housings. Intermittent faults that occur only in wet conditions and clear up when dry are a reliable indicator of moisture-related connection issues.
: invalid url input)
usmile
Liquid error (snippets/blog-best-product line 36): product form must be given a product
Liquid error (snippets/blog-best-product line 59): product form must be given a product