Converting your regular bicycle into an electric bike is an exciting project, but like any mechanical endeavor, it comes with potential challenges. Understanding common e-bike conversion kit problems before they occur—and knowing how to solve them—will save you time, frustration, and money.
This troubleshooting guide covers the most frequent issues riders encounter and provides practical solutions to keep your conversion kit running smoothly.
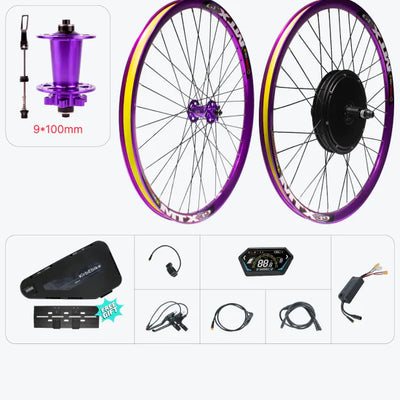
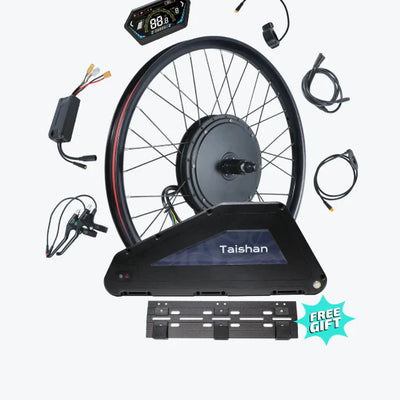
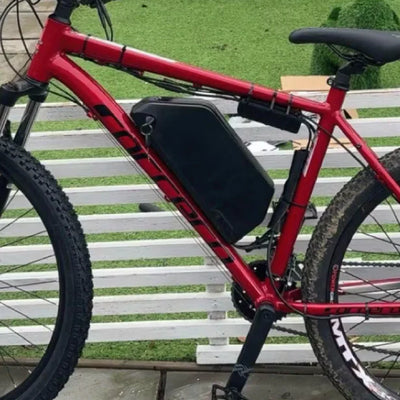
Understanding Your E-Bike Conversion System
![]()

Before diving into problem-solving, it's helpful to understand how your kit works. An e-bike conversion system consists of interconnected components: the motor (hub or mid-drive), battery, controller, display, pedal assist sensor (PAS), brake sensors, and wiring harness. When one component fails or malfunctions, it often creates a domino effect throughout the system.
Motor-Related Problems
Motor Not Engaging or Providing Power
Symptoms: You pedal but receive no assistance, or the motor doesn't respond when you activate the throttle.
Common Causes & Solutions:
|
Problem
|
Solution
|
|
Low or depleted battery
|
Charge battery fully and verify voltage with multimeter
|
|
Loose motor cable connection
|
Check and reseat all motor connector plugs
|
|
Faulty controller
|
Test controller output with multimeter; replace if necessary
|
|
Damaged hall sensors inside motor
|
Professional repair or motor replacement required
|
|
Incorrect PAS sensor alignment
|
Adjust sensor gap to 2-5mm from disc
|
Step-by-step fix:
- Check battery charge level on display
- Inspect all electrical connections for looseness or corrosion
- Test PAS sensor by spinning pedals slowly while watching display
- Verify brake sensors aren't stuck in "engaged" position
- Check controller for error codes on display
Motor Makes Unusual Grinding or Clicking Noises
Possible causes:
- Worn internal gears (geared hub motors)
- Loose motor mounting bolts
- Damaged bearings
- Debris inside motor casing
Fixes:
- Tighten all motor mounting bolts to specified torque
- Check torque arm installation (essential for aluminum forks/dropouts)
- Inspect motor for external damage or entry points for water/debris
- If grinding persists, motor may need professional servicing or replacement
Motor Overheating
Hub motors and mid-drive systems can overheat during extended hill climbs or high-load situations.
Prevention strategies:
- Use appropriate assist levels (don't stay on highest setting continuously)
- Pedal actively rather than relying solely on motor
- Allow motor to cool after prolonged climbs
- Ensure adequate ventilation around motor
- Check that controller current limits are properly set
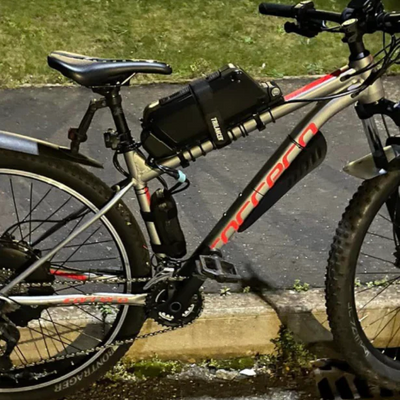
Battery and Charging Issues
![]()

Battery Not Charging or Holding Charge
Diagnostic steps:
-
Test the charger: Use a multimeter to verify output voltage matches specifications (typically 42V for 36V batteries, 54.6V for 48V batteries)
-
Inspect battery connections: Clean charging port with electrical contact cleaner; check for bent pins
-
Check BMS (Battery Management System): The BMS may have triggered protection mode due to:
- Over-discharge (battery voltage too low)
- Temperature extremes
- Cell imbalance
- Short circuit detection
Solutions:
- Leave battery connected to charger for 24 hours (sometimes revives deeply discharged batteries)
- Store and charge battery at room temperature (10-25°C optimal)
- If cells are imbalanced, BMS may require professional rebalancing
- Replace charger if output voltage is incorrect
Reduced Range or Sudden Power Drops
Common culprits:
-
Battery degradation: Lithium batteries naturally lose capacity over 800-1000 charge cycles (typically 3-5 years)
-
Cold weather: Battery performance drops significantly below 10°C
-
Tire pressure: Under-inflated tires dramatically increase power consumption
-
Assist level too high: Constant use of highest assist drains battery quickly
Optimization tips:
- Keep battery between 20-80% charge for longevity
- Store at 50-60% charge during long periods of non-use
- Maintain proper tire pressure (check weekly)
- Use lower assist levels when possible
- Check for dragging brakes adding resistance
Battery Won't Lock or Unlock
This mechanical issue is surprisingly common:
Quick fixes:
- Clean lock mechanism with compressed air
- Apply small amount of dry lubricant to key and lock
- Check mounting rails aren't bent or obstructed
- Verify lock cylinder hasn't seized (may need replacement)
Electrical Connection Failures
Display Shows Error Codes or Goes Blank
Error codes vary by manufacturer, but common ones include:
|
Error Code
|
Meaning
|
Solution
|
|
21 or 22
|
Throttle issue
|
Disconnect and reconnect throttle; check for damage
|
|
30
|
Communication error
|
Check all connector cables between display and controller
|
|
06 or 07
|
Battery voltage abnormal
|
Check battery charge and BMS status
|
|
08
|
Motor hall sensor fault
|
Check motor connector; may need motor service
|
General troubleshooting:
- Power cycle the entire system (turn off, disconnect battery, wait 30 seconds, reconnect)
- Check for water ingress in connectors
- Apply dielectric grease to all connections
- Ensure display cable isn't pinched or damaged
Intermittent Power Cutouts
Random power interruptions are frustrating but usually stem from:
Wiring issues:
- Loose connections vibrating apart during riding
- Frayed wires with intermittent contact
- Poor-quality connectors (common in budget kits)
Solutions:
- Use electrical tape or zip ties to secure all connections
- Check motor cable where it exits motor (common failure point)
- Inspect battery connector for wear or corrosion
- Consider upgrading to higher-quality connectors if problems persist
Water Damage and Corrosion
While most conversion kits have basic weather resistance, prolonged exposure to rain can cause problems.
Prevention:
- Apply silicone-based waterproof spray to connections
- Use dielectric grease on all connectors
- Add heat-shrink tubing over exposed connections
- Never pressure wash your e-bike
- Dry bike thoroughly after wet rides
Repair:
- Clean corroded connections with electrical contact cleaner
- Use fine sandpaper or wire brush on corroded pins
- Replace severely damaged connectors
- Check controller compartment for moisture
Brake Sensor Malfunctions
Brake sensors cut motor power when you squeeze brake levers—a critical safety feature.
Motor Won't Start (Brake Sensors Stuck)
Symptoms: Display shows battery charge but motor won't engage regardless of pedaling or throttle input.
Diagnosis:
- Brake sensor may be stuck in "activated" position
- Display may show brake indicator light constantly on
Fixes:
- Disconnect one brake sensor at a time to isolate faulty unit
- Check sensor lever hasn't slipped out of position
- Clean sensor contact points
- Adjust sensor position so lever fully releases
- Replace faulty sensor (available as spare parts)
Motor Doesn't Cut When Braking
Dangerous situation requiring immediate attention.
Emergency solutions:
- Disconnect both brake sensors temporarily and rely on turning off assist
- Check sensor connector orientation (can sometimes be plugged in reversed)
- Verify sensors make proper contact with brake levers
- Adjust brake lever reach if levers don't pull sensors
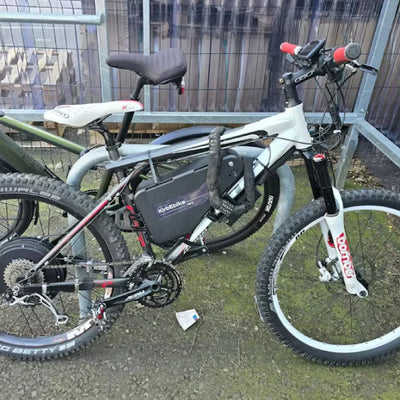
Installation-Related Problems
Motor Doesn't Fit in Dropouts
Compatibility issues:
Before installation, verify:
- Dropout width matches motor axle (typically 135mm rear, 100mm front)
- Dropout opening isn't obstructed by disc brake mounts
- Frame has clearance for motor diameter
Solutions:
- Use included washers to adjust axle length
- File dropout slightly if just 1-2mm too narrow (aluminum only, never carbon)
- Consider different motor configuration (rear vs. front hub)
- For mid-drive kits, verify bottom bracket shell compatibility
Battery Doesn't Fit Frame
Space constraints:
Downtube batteries won't fit all frames, especially:
- Small frame sizes (under 17")
- Frames with curved or sloping top tubes
- Full-suspension mountain bikes with limited triangle space
Brake Incompatibility
Hydraulic brake issues:
Many conversion kits include mechanical brake sensors that don't work with hydraulic brakes.
Solutions:
- Purchase hydraulic-compatible brake sensors separately
- Use magnetic brake sensors that attach to brake calipers
- Some systems allow disabling brake sensors (not recommended for safety)
- Upgrade to e-brake levers with integrated sensors
Performance Problems
Top Speed Lower Than Expected
Reality check: Advertised speeds are often "theoretical maximum" under ideal conditions (fully charged battery, flat ground, no wind, lightweight rider).
Factors affecting speed:
- Rider weight and cargo
- Tire type and pressure
- Wind resistance
- Terrain (hills dramatically reduce speed)
- Battery charge level
- Controller current limits
Optimization:
- Inflate tires to maximum safe pressure
- Reduce wind resistance (lower riding position)
- Ensure battery is fully charged
- Check motor isn't rubbing against frame or fender
- Verify controller speed settings in display menu
Poor Hill Climbing Performance
Especially relevant for hub motor kits:
Understanding torque vs. speed:
- Hub motors perform best at specific RPM ranges
- Very steep hills force motor below efficient speed
- Mid-drive motors typically climb better (leverage from gears)
Improvement strategies:
- Use lower gears to keep motor in efficient RPM range
- Add pedal power on steep sections
- Consider battery upgrade for higher current output
- Use higher assist levels on climbs
- Zigzag on extremely steep grades
Excessive Battery Drain
Power consumption diagnosis:
Track these factors:
- Average assist level used
- Terrain (hills consume 2-3x more power)
- Rider pedaling input
- Tire pressure
- Average speed (higher speeds use exponentially more power)
Extending range:
- Start rides in lower assist levels
- Pedal actively rather than ghost-pedaling
- Maintain consistent moderate speed
- Plan routes avoiding excessive hills
- Consider carrying spare battery for long rides
Conclusion
Most common e-bike conversion kit problems are solvable with basic tools, patience, and systematic troubleshooting. By understanding how your system works and addressing issues promptly, you'll enjoy reliable performance from your converted bicycle.
Remember that quality components make a difference—investing in a well-manufactured e-bike conversion kit from the start reduces long-term problems. Regular maintenance, proper installation, and careful operation will keep your electric bike running smoothly for thousands of miles. When in doubt, consult manufacturer support resources and don't hesitate to seek professional help for complex issues.
Frequently Asked Questions
Why does my e-bike motor cut out randomly while riding?
Random cutouts usually indicate loose electrical connections vibrating apart or intermittent wiring faults. Check all connector plugs are fully seated, inspect cables for damage especially near the motor exit point, and secure connections with electrical tape or zip ties to prevent movement.
How do I know if my battery or controller is faulty?
Test systematically: check battery voltage with a multimeter (should match specifications when fully charged), verify charger output voltage is correct, and look for error codes on display. If battery voltage is normal but motor won't run, controller is likely faulty.
Can I ride my converted e-bike in the rain?
Most conversion kits have basic water resistance but aren't fully waterproof. Riding in light rain is generally fine, but avoid deep puddles and never pressure wash your e-bike. Apply dielectric grease to connections and dry components thoroughly after wet rides.
Why does my pedal assist have a delayed response?
Check PAS sensor alignment (should be 2-5mm from disc), ensure disc magnets are intact, verify battery voltage is adequate, and adjust PAS sensitivity settings in your display menu if available. Weak batteries often cause sluggish response.
How often should I replace my e-bike chain?
E-bike chains wear faster than standard bike chains due to increased torque, especially with mid-drive motors. Inspect weekly and replace every 1,500-3,000 km depending on riding conditions and power levels used. A chain wear indicator tool helps determine replacement timing.
What should I do if my battery won't charge?
First verify charger output voltage with a multimeter, then clean charging port contacts with electrical contact cleaner. If battery is deeply discharged, leave connected to charger for 24 hours. Battery BMS may have triggered protection mode requiring professional reset if these steps don't work.
Is it normal for my hub motor to get warm during riding?
Motors generate heat during operation, especially during hill climbs or high-power use. Warm to the touch is normal, but if too hot to hold your hand on for several seconds, reduce assist level and allow cooling time. Continuous overheating can damage motor internals.
: invalid url input)
usmile
Liquid error (snippets/blog-best-product line 36): product form must be given a product
Liquid error (snippets/blog-best-product line 59): product form must be given a product