Ebike Controller App Settings: Three Profiles for One 2000W System
Two settings do most of the work. DC current sets the ceiling, acceleration strength sets how fast you approach it — and because they are independent, one kit can be set up for range, for urban control, or for private-land response.
AK
Andy Kirby
Reviewed by the KirbEbike conversion-support team
Share
Unlock £10 off today
On this page
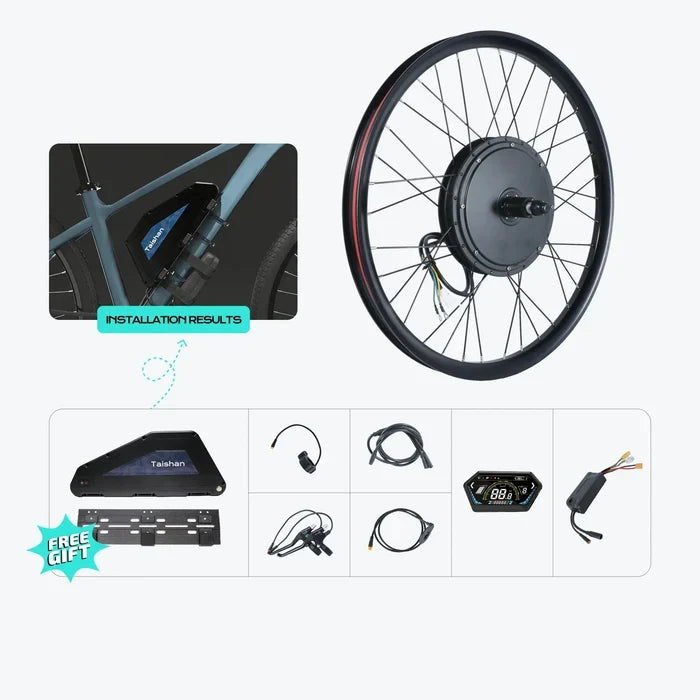
KirbEbike 2000W product configuration. Confirm the selected variant and included components.
METHOD, NOT PRESETSPRIVATE LAND ONLYUK MARKET
THE SHORT ANSWER
Change DC current and acceleration strength. Those two create genuinely different ride profiles; PAS-level behaviour and speed settings refine each one. Change them one at a time, and always from a recorded factory baseline you can return to.
Two settings create the profiles; the rest refine them. None changes the hardware or the classification.
Change one parameter at a time. If you alter current and acceleration in the same session, any difference you feel is uninterpretable and any problem is untraceable.
DC Current and Acceleration Strength Are Independent
Relative positions on two unlabelled axes, not recommended values. Your own figures come from your verified system limits, not from a chart.
That independence is the point people miss. DC current caps how much the controller may draw from the pack, setting the torque available and therefore the system’s real capability. Acceleration strength does not change that ceiling at all — it changes the rate at which the controller ramps toward it. So a high ceiling with a gentle ramp still climbs hard while feeling calm, and a modest ceiling with a sharp ramp feels lively off the line and runs out sooner. Our wattage and speed guide covers why gradient, not setting, dominates the power actually demanded.
Two further distinctions. Maximum current is not the current you use while cruising — holding a steady speed draws far less than the ceiling, which is why lowering it often changes nothing on a steady route. And PAS levels are not the current limit: assist levels divide up what the system delivers, while the current limit sets what that maximum is.
Before You Build Profiles: Record the Baseline
Confirm the exact battery variant and its permitted continuous current before changing controller settings.
💡
Six things to do before changing a single setting
Confirm the system is already matched — battery, BMS, controller and motor suit each other before any tuning
Record the hardware maximum — the controller’s rated current, separately from the software limit currently set
Save or export the original configuration — a known-good state you can restore without guesswork
Record the app version and controller firmware — settings behave differently across versions
Photograph every relevant settings screen — faster and more reliable than writing values down
Ride the baseline route first — you cannot judge an improvement without a before
That last one matters more than it sounds. Most riders who report a profile as better have no baseline to compare against, so they are describing a feeling rather than a result. Ride your normal route at the factory settings, record watt-hours consumed and average speed, and you have something to measure against. If the installation itself is not sound — loose axle hardware, worn brakes, a missing torque arm — fix that first, because tuning magnifies those problems rather than hiding them. Our installation mistakes guide covers what to check.
The Three Profiles Compared
Profile
DC current
Acceleration
Best for
Range
Lower than factory
Softer
Longer routes, preserving parts and battery
Urban control
Moderate
Mid-level
Traffic, shared paths, wet roads
Private-land response
At your verified ceiling
Sharper
Loose ground, climbs, short sessions
Relative settings only. Actual values depend on your controller, firmware and battery.
Profile 1: Range — Softer Starts, Lower Peak Demand
Start by lowering DC current below the factory value, then soften acceleration strength before you consider cutting cruising speed — the ramp is where the energy goes on a stop-start route. Use lower PAS levels for routine riding rather than relying on the ceiling to restrain you. Then measure watt-hours used, not battery bars, because a percentage readout is too coarse to show the difference. Be honest about when this works: lower current genuinely extends range on routes with frequent hard pull-aways, and barely changes anything on steady cruising where the ceiling was never reached. Our guide to hub motor internals explains why.
Profile 2: Urban Control — Smooth Without Feeling Flat
Use moderate DC current rather than maximum, and a mid-level acceleration strength so starts are predictable in traffic. Space the PAS levels so each step feels meaningfully different — a map where levels 2, 3 and 4 feel identical wastes three of your five options. Test stop-start behaviour as well as cruising, because a profile that feels good at speed can still lurch at walking pace. Watch specifically for wheelspin on wet drain covers, surging as assist engages, and abrupt throttle response from standstill. A smoother urban profile also reduces peak load and heat, which is a durability benefit as well as a comfort one.
Profile 3: Private-Land Response — Faster Ramp Within Limits
Raise DC current only within the verified system limit — the lowest of what the battery can continuously supply, what its BMS allows and what the controller is rated for — and raise acceleration strength as a separate change so you can tell which one you felt. Then watch the system rather than the speedometer: check voltage sag during hard acceleration, and monitor battery, controller and motor temperature after sustained load rather than after a short burst. Stop immediately on cut-outs, error codes or abnormal heat. Reserve full-response testing for appropriate private land with the landowner’s permission. Our 52V 2000W kit and 2600W kit publish their controller ratings; the pack rating is the other half of the sum.
Low Current or Soft Acceleration: Which Saves More Energy?
They act on different things. Lower DC current caps the peak, so it only saves energy where the ride actually reaches the ceiling. Softer acceleration changes the ramp, so it reduces the energy going into every pull-away regardless of where the ceiling sits. On stop-start routes both help and the ramp often helps more; on steady routes neither does much, because the same cruising speed requires similar power whatever the settings say.
Hills are the exception worth naming. A lower ceiling means climbing more slowly and spending longer under load, which on a direct-drive hub can use more energy overall while running the motor hotter. Do not set current low purely to chase range if your routes include serious climbs. And compare watt-hours per mile, never battery percentage used — percentage readouts are non-linear and too coarse to resolve the difference between two profiles.
What the Ride Power App Can Adjust
Official controller image. Hardware, connectors and supported settings vary by controller version.
On compatible controllers the app connects over Bluetooth and shows live data — battery voltage, throttle voltage, speed and fault information — which is what makes profile testing practical without a laptop at the roadside. Adjustable parameters include DC current, acceleration strength, PAS levels, and regenerative braking where the motor and controller support it, plus saving, exporting and importing compatible configurations and restoring a known-good one. See the controller and display range for which units are compatible.
Two honest limits. Regenerative braking availability depends on the motor and controller combination, so confirm it for your exact kit rather than assuming. And the permitted range for each parameter is set by your controller and firmware, not by this article — the app will show you what it allows.
App-Tunable vs Display-Programmable Systems
1. Bafang Systems with Dealer Tools
Bafang mid-drives are configured through dealer-level tools or a compatible display rather than a consumer app, with parameters including current, speed and assist behaviour. The depth is genuinely high in the right hands, which is why workshops favour it. The limitations for a rider building ride profiles are practical: it usually needs a computer and a programming cable, newer firmware is increasingly locked, and the workflow suits a one-off setup better than switching between profiles on a ride.
2. Display-Programmed Kits
Many budget kits are configured through the display itself, using its settings menus rather than an app, which covers wheel size, speed limit, assist levels and some current parameters. The advantage is that nothing extra is needed — no phone, no cable, no pairing — and the settings persist reliably. The limitations are a small screen, terse parameter codes that need the manual open beside you, no live data logging, and no way to save or export a configuration, so restoring a previous profile means re-entering it by hand.
3. KirbEbike Ride Power-Compatible Controllers
Bluetooth configuration of DC current, acceleration strength, PAS mapping and regenerative braking where supported, with live data and saved configurations — the saving is what makes running three profiles practical rather than theoretical. Fitted across our range including the 52V 2000W kit; see the controller range. Honest limits: it pairs with our own compatible controllers and displays rather than universally, the units are potted so a fault means replacement, and permitted parameter ranges depend on your firmware version.
4. TQ HPR Systems with the TQ E-Bike App
A premium OEM mid-drive system with its own smartphone app offering assist tuning, firmware updates and diagnostics, fitted to complete bikes rather than sold as a conversion. It is included here as a useful reference for what polished app tuning looks like: the interface is more refined than most aftermarket tools. The limitation for this audience is straightforward — it is not available as a conversion component, and tuning is bounded within what the manufacturer permits for a certified system.
Option
Adjustment route
Saved profiles
Live data
Main limitation
Bafang dealer tools
PC or display
Limited
No
Cable and computer needed
Display-programmed kits
Display menus
No
No
Re-enter settings by hand
KirbEbike Ride Power
Bluetooth app
Yes
Yes
Own-brand pairing; potted
TQ HPR app
Manufacturer app
Yes
Yes
Not a conversion component
Listed alphabetically. Saved configurations are what make multiple profiles practical.
Do Speed Settings Make a 2000W Ebike Road-Legal?
No, and this is worth being unambiguous about. A software limit is a user setting, not motor certification. In Great Britain an Electrically Assisted Pedal Cycle must have pedals capable of propelling it, a motor whose maximum continuous rated power does not exceed 250W, and electrical assistance that cuts off at 15.5mph (GOV.UK). Continuous rated power is a property of the motor, established by how it is built and rated — certification schemes examine the electrical drive train, battery and charger as a tested combination (UL Solutions), not a number entered in an app.
💡
A SWITCHABLE MODE IS THE PROBLEM, NOT THE SOLUTION
The Department for Transport addresses this feature directly: some electric cycles offer a temporary increase in top speed, often advertised as "off road" mode, and vehicles with that feature do not, in its opinion, comply with the EAPC regulations and are considered motor vehicles. So selecting a lower setting does not make a 2000W kit road-legal, and the ability to switch back is itself the disqualifying characteristic. A high-power build falls under motor-vehicle rules, requiring the relevant approval, registration, tax, insurance, licence and equipment — or use on private land with the landowner’s permission and subject to site rules.
How to Test Whether a Profile Is Actually Better
Record the data supported by your exact display and controller. Values shown are product artwork, not test results.
Keep the same rider, bike and battery, start each run at a comparable state of charge, and hold tyre pressure and payload constant. Use the same route in the same direction, and record elevation, wind and temperature so you can discard outliers rather than averaging them in.
Then record average speed and stops, watt-hours consumed, voltage sag and peak current if reported, and battery and controller temperature. Repeat each profile more than once — day-to-day variation is larger than the effect you are looking for. And judge consumption alongside average speed: if watt-hours per mile fell but so did average speed, you made a slower journey rather than a better profile.
What Not to Change Just Because the App Lets You
Do not
Why
Raise current beyond battery or BMS capability
Cut-outs, heat and pack stress; the battery sets the ceiling
Change low-voltage protection without verified data
It protects the cells from over-discharge
Run self-learning as a performance upgrade
It is a commissioning step, not a tuning tool
Copy settings between controllers
Different hardware, firmware and battery make the values meaningless
Treat a higher number as automatically better
More current is more heat and more demand, not more capability
Keep testing after cut-outs or abnormal heat
Stop and investigate; forcing protection causes damage
If a change requires overriding a protection feature, it is the wrong change.
Common App Problems
The app cannot find the controller — check the system is powered, Bluetooth permissions are granted, and the controller is a compatible model
It connects but settings do not load — usually an app or firmware version mismatch; note both before contacting support
A changed setting does not affect the ride — often because the ride never reached that limit, or the change did not save
The motor cuts out after raising current — the battery or BMS cannot supply it; restore the previous value and check the ratings with our BMS amps guide
The bike feels jerky after increasing acceleration — the ramp is too sharp for the surface; soften it
Voltage drops sharply under load — sag beyond what the pack should show; stop raising settings and check the battery
Product touchpoint
Build the profiles around your verified limits
The figures that matter are your own: the controller’s rated current, what the battery can continuously supply, and what its BMS allows. Establish those with our BMS amps guide and battery-to-motor matching guide before changing anything, then set your ceiling below the lowest of them. If you would rather not do the matching yourself, a kit supplied with a matched battery removes the question — and if a setting causes cut-outs, the answer is a better-matched pack, not a higher number.
DC current sets what the system can do; acceleration strength sets how it feels doing it. Because they are independent, one 2000W kit can genuinely serve as a range-focused machine, a manageable urban bike and a sharp private-land build — without changing a single component.
Record the factory baseline first, change one parameter at a time, and test each profile against a real route rather than a feeling. Keep every setting inside what the battery, BMS, controller and motor actually support, and stop if you see cut-outs, error codes or abnormal heat. And keep the legal position clear: no app setting turns a 2000W build into a road-legal EAPC (GOV.UK), so profiles are about control, not classification. Use only a charger authorised for your pack (GOV.UK).
One kit, three configurations
Set the ceiling from your verified limits, then shape the ramp for where you ride.
DC current and acceleration strength do most of the work. PAS-level behaviour and speed settings refine each profile. Change one at a time, from a recorded baseline you can restore.
What is the difference between DC current and acceleration strength?
DC current caps how much the controller may draw from the battery, setting the torque available. Acceleration strength sets how quickly it ramps toward that ceiling without changing the ceiling itself.
Can one 2000W kit have different ride profiles?
Yes, on a controller that saves configurations. Because the two main settings are independent, the same hardware can be set for range, urban control or private-land response.
Does lowering DC current increase range?
Sometimes. It caps the peak, so it saves energy only where the ride actually reaches the ceiling — mainly hard acceleration. On steady cruising it usually changes very little.
Should I change acceleration or current first for gentler starts?
Acceleration strength, because it softens delivery without reducing the torque available when you genuinely need it, such as a hill start or pulling out of a junction.
Why did my setting change make no difference?
Most likely the ride never reached that limit, so the ceiling was never binding. Check also that the change actually saved, and compare watt-hours per mile rather than battery percentage.
Does a speed setting make a 2000W ebike road-legal in the UK?
No. Classification follows the motor’s continuous rated power, and DfT states that cycles offering a temporary top-speed increase do not comply with EAPC regulations and are considered motor vehicles.
Can I copy another rider’s app settings?
No. Different controller, firmware, battery, motor, weight and terrain make their values meaningless on your bike, and a setting that suits their pack may exceed what yours can supply.
Why does my motor cut out after I raised the current?
The battery or its BMS cannot supply what you configured. Restore the previous value and compare the controller’s draw against the pack’s continuous and BMS rating before trying again.
What is self-learning and should I run it?
It is a commissioning procedure where the controller identifies the motor’s hall arrangement and phase order. Run it when fitting a new controller or motor, not as a performance upgrade.